N64 - The Legend of Zelda: Ocarina of Time Save Transfer Guide
Kyle Niewiada on May 01, 2016
4 Minute Read | Guide
Updated on October 01, 2021
It was brought to my attention that my original blog post outlining the process I took to dump my Nintendo 64 save files was not very friendly when people wanted to use it as a guide. Originally, I was going to edit the blog post to incorporate new guide steps, but I soon realized that I was straying away from the scope of that blog post; to outline and describe the process I took to recover my save collection. Below are the steps to follow if you would like to backup your save file for the Nintendo 64 game, The Legend of Zelda: Ocarina of Time.
Required tools:
- Linux Mint (live CD will work too)
- You can choose whatever Linux distro you would like, but the tutorial steps may not match with other Linux distros.
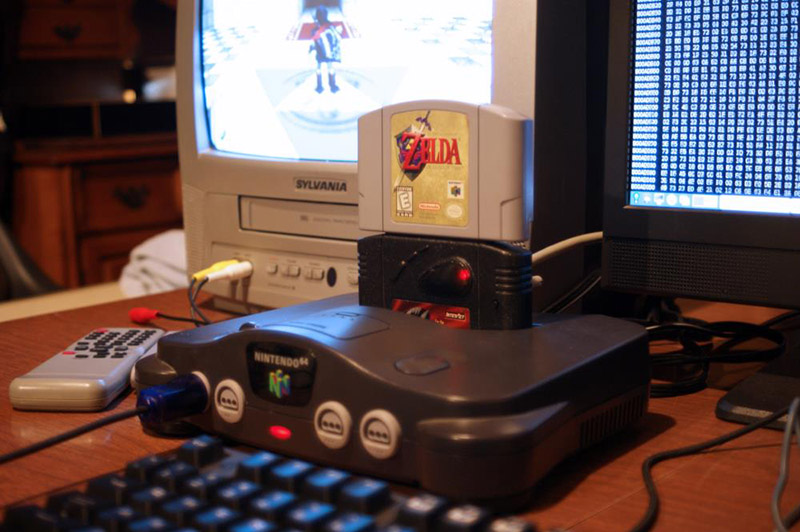
- A Working Nintendo 64 (and controller)
- It would be best if you could connect this to a TV so you can see the screen. Although I guess if someone makes a TASBot, you wouldn’t need a TV for it.
- 8 MB Expansion Pak
- Nintendo 64 GameShark with a working parallel port
- A working parallel port can usually be found on cartridge versions 3.2 and 3.3
- Computer with a working parallel port
- Parallel cable
- Other users were unable to get a USB to parallel cable to work. I would advise against using an adapter.
- The Legend of Zelda: Ocarina of Time
- Super Mario 64
- Or equivalent. This game is only needed to boot GameShark and change keycode for Ocarina of Time.
Part One: Preparing the Transfer Computer
- Have your machine (with the parallel port) turned on and booted into its Linux partition or a Live CD equivalent.
- On that machine download the latest release of N64RD. This tutorial uses version 0.2.0.
- Unzip its contents and navigate to the directory using a terminal.
-
To build N64RD, we need to install ‘scons’. From the command line, run:
sudo apt-get install -y scons -
After scons has finished installing, in the directory of the unzipped code, to build N64RD run:
scons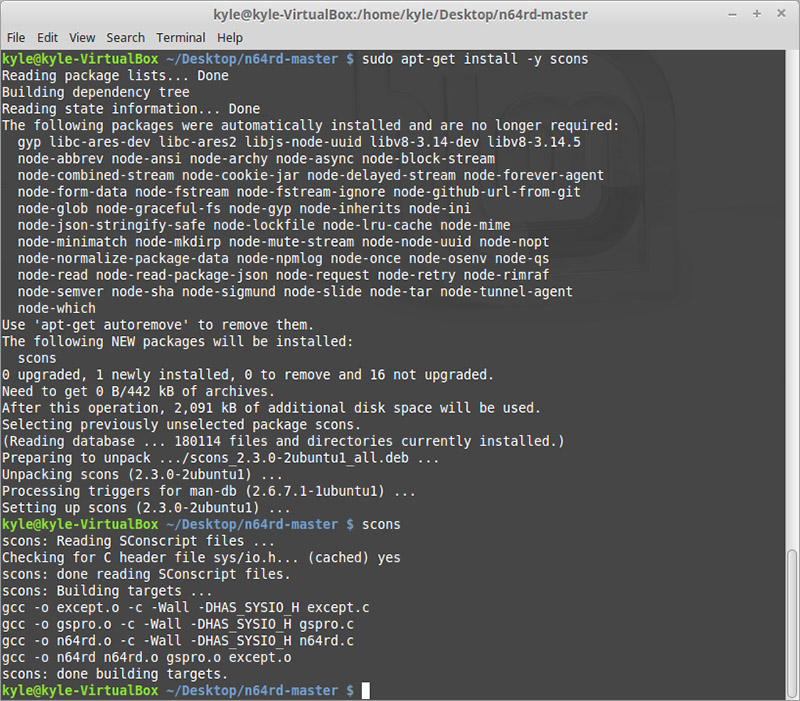
- Your directory should now contain the ‘n64rd’ commandline executable file.
- Leave the terminal open and your machine on during the next few steps.
Part Two: Preparing the Nintendo 64
If your Nintendo 64 freezes at any point, you will need to power down your Nintendo 64 and begin again from Part Two: Step 3.
- Make sure the 8 MB Expansion Pak is installed in your Nintendo 64.
- Connect the Nintendo 64 to the television, and plug in the power cable.
- Insert Super Mario 64 into the GameShark, and insert the GameShark into the Nintendo 64.
- Turn on your TV and the Nintendo 64.
- Once the GameShark main menu has appeared, select ‘key codes’, scroll down to the keycode named “Zelda”, and activate it.
- Turn off your Nintendo 64.
- Take out the Super Mario 64 cartridge and replace it with the Legend of Zelda: Ocarina of Time.
- Connect your Nintendo 64 GameShark to your transfer computer with your parallel cable.
- Turn on your Nintendo 64.
- Go to the cheat menu and disable all cheats for Legend of Zelda: Ocarina of Time. This is to prevent any cheat conflicts from interfering with our RAM dump.
- Next, press the start button to load the ‘Start Game Options’ menu.
- Turn on the code generator.
- Launch the game with codes.
- Load the save file from the main menu that you wish to dump. Only one save may be dumped from RAM at a time.
- After the game has loaded, press pause.
Part Three: The Transfer
-
If everything is still running normally, on your transfer computer execute a RAM dump by running the following command with N64RD in the terminal.
$ ./n64rd -dmemory.z64 -a 0x80000000 -l 0x00800000 - This will take quite some time. I think I recall somewhere in the neighborhood of 10-20 minutes. After the execution begins, your game will probably freeze. This is fine.
- When N64RD has finished executing, you should have an 8 MB RAM dump file in that folder named ‘memory.z64’. Congratulations! You have dumped the active memory of the Legend of Zelda: The Ocarina of Time. You may now power down your Nintendo 64.
Part Four: Extracting the Save
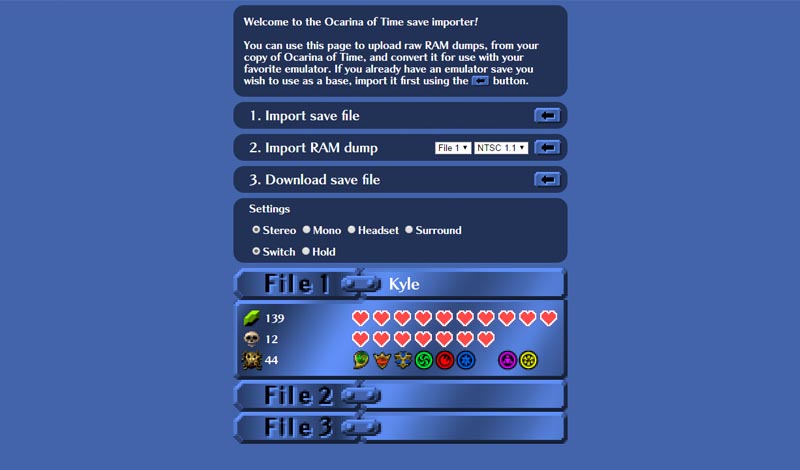
On a previous blog outlining the process I used to dump my Ocarina of Time save file, the user Bkacjios took some of that information to create a online RAM dump to save file converter. It will extract your save file from the RAM dump and generate a save file with a good checksum (making it a valid non-corrupt save).
- Use this wiki to determine which Ocarina of Time cartridge version you have.
- Navigate to https://bkacjios.github.io/OOT-Save-Converter/, import your RAM dump, select the correct cartridge version, and download your save file. Feel free to change any of the other options before downloading such as the file slot or other game settings.
- Congratulations! You have successfully dumped your Ocarina of Time RAM and extracted your save file to be used with emulators and other tools.