Streaming a Virtual Reality Spectator View to My Raspberry Pi 2
Kyle Niewiada on May 31, 2016
8 Minute Read | Medium project
Updated on March 29, 2024
I think virtual reality is a lot of fun. I had a friend in college demo an Oculus DK1 to me and I was pretty amazed; even though I was running it on a laptop and the display drivers turned everything into wireframe models. I remember getting my hands on my first Google Cardboard, sliding my phone in, and exploring the world through Google Earth. When the HTC Vive went on sale with its advertised room-scale, I bought it. My first real chance to become heavily immersed in a virtual world.
UPDATE (10/27/2016): After the most recent Raspbian update, I need to use an external powered USB hub for my wireless adapter. This is necessary to use the 5 GHz band which requires more power.
However, my HTC Vive setup did not fit in my room. I ended up running some cables to put it in the room next door. But there was a problem. I wanted to let those around me in the VR room see what I was seeing. I had to figure out a way to mirror or broadcast my desktop to the other room.
My first thought was that I was going to use my Steam Link as a way to rebroadcast desktop. After all, it’s another product by Valve and its primary function is for streaming games. I thought this was going to work because it had the feature to minimize the Steam Big Picture application and use the desktop instead. But as I began to find out, this did not work with all Steam VR applications and the usability of the HTC Vive suffered.
If I launched games from my Steam Link, I could no longer use the VR menu. If I tried to launch the Steam Link after I was in the VR menu, it would refuse because I was already “in game”. I tried using alternative software such as Splashtop (Remote software) to stream it to my device, but it was unable to draw the desktop unless I forced it; this interfered with my Vive yet again.
After failing to use the Steam Link and Splashtop, I came across others mentioning Nvidia’s GameStream as an alternative to streaming gameplay. Nvidia has a built-in feature with their new-ish graphics cards that allow one to stream their gaming setup to an Nvidia Shield tablet. I did not own a Nvidia Shield tablet. Luckily there was an open source client alternative, Moonlight Embedded, that would allow streaming to a number of different clients. Sure, I could have probably set up a VNC server/VNC client but who knows how long it would have taken for me to get optimized for streaming games, and where was the fun in that?
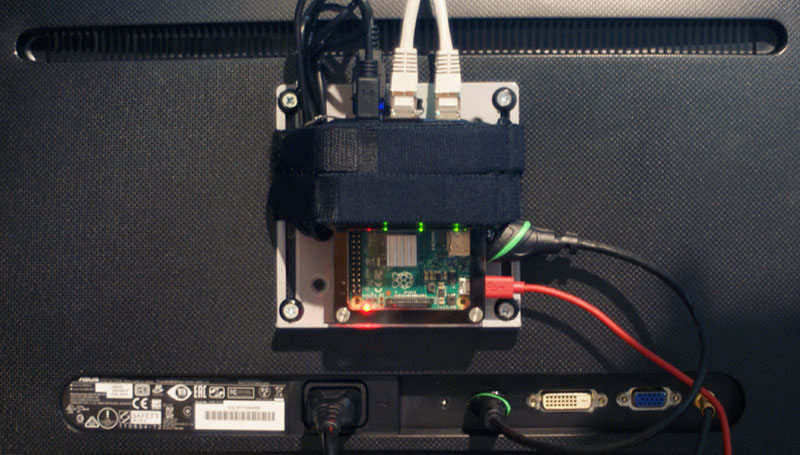
It was settled. I was going to install Moonlight Embedded to my Raspberry Pi 2. Here is my setup so far.
What I used:
- Raspberry Pi 2 running Raspbian Jessie (May 2016) using NOOBS
- Including peripherals such as micoSD card, HDMI cable, case, mouse, keyboard, USB micro power adapter, a method to connect to home network such as wireless adapter or ethernet.
- Computer with Windows 10
- Nvidia GTX 970 graphics card
- Moonlight Embedded
Setting Up the Pi
The first thing that I did was install the latest Raspbian Jessie release on my Raspberry Pi 2 using NOOBS (2024-03-29: This method is now unsupported). I originally was using the TP-LINK TL-WDN3200 wireless adapter with my Raspberry Pi to connect on the 5 GHz network. But as I found out later, this was a problematic adapter. I was able to get the TP-LINK TL-WDN3200 working perfectly. I needed to remove DHCPCD (and the default network manager) and use WICD to manage my wireless adapter as DHCPCD appeared to make some kind of aggressive roaming check every minute creating a severe lag on my wireless signal. Make sure the Raspberry Pi is connected to the Internet before continuing.
After my installation was finished, I followed the Moonlight Embedded directions found in the documentation
Adding the line:
deb http://archive.itimmer.nl/raspbian/moonlight jessie main
to this file:
/etc/apt/sources.list
And running the following to install Moonlight Embedded.
apt-get update
apt-get install moonlight-embedded
Once everything was complete, Moonlight Embedded was installed on my Pi and ready to use.
Setting Up the Computer
I switched over to my desktop, opening up Nvidia GeForce Experience, and added the information below as a custom Shield game. Out of the box, Moonlight Embedded will launch you to the Steam Big Picture mode and leave you with the same problem as the Steam Link; getting stuck with Steam’s streaming mess. However, with Nvidia GeForce Experience, we can add the ability to stream the desktop without interfering with SteamVR at all. In Nvidia GeForce Experience, add the custom game to GameStream found below .
The application below is Windows’ built-in remote desktop software. It is what I use it to access my PC machine from the Pi in a separate room.
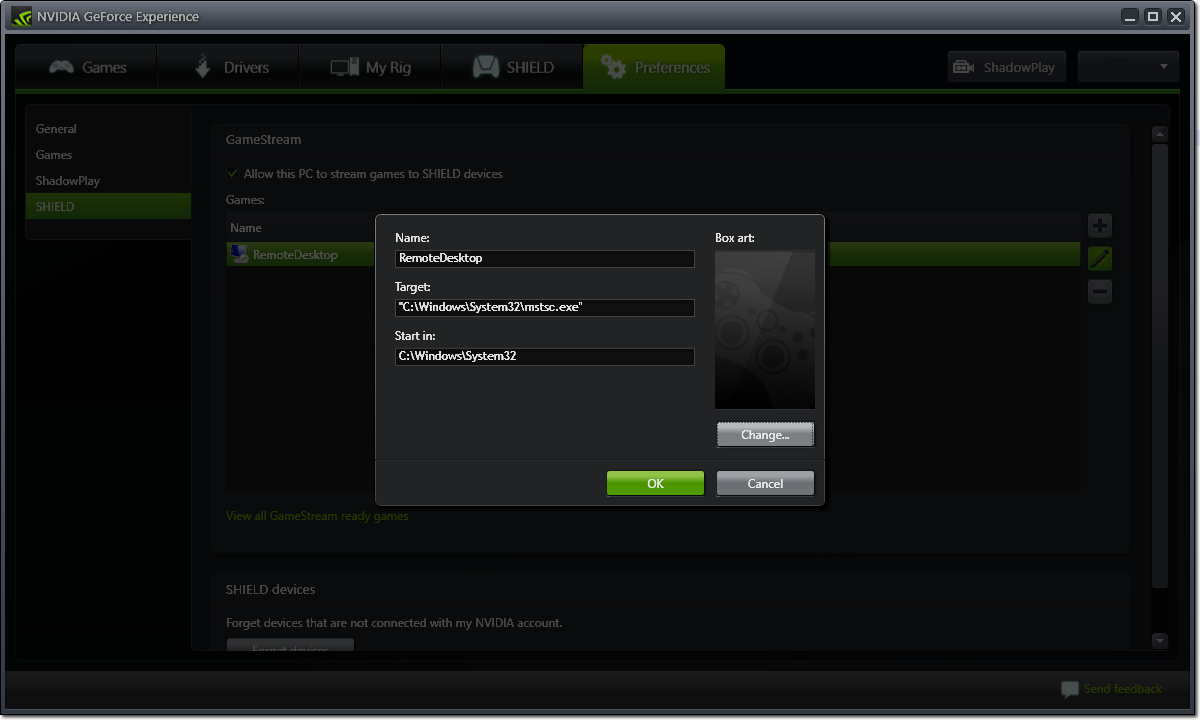 Adding remote desktop as a Nvidia GameStream custom game
Name: RemoteDesktop
Target: "C:\Windows\System32\mstsc.exe"
Start in: C:\Windows\System32
Finishing the Pi
To finish the setup, Raspberry Pi needs to be paired as a GameStream client to your PC.
To initiate pairing, type the following on your Raspberry Pi terminal:
moonlight pair 192.168.1.X
Replace 192.168.1.X with your PC’s IP, which can be found by typing
ipconfiginto the Windows command prompt and matching it with your network interface
Once pairing has been initiated, a window will pop up on the Windows desktop prompting for a code to be entered. Type in the pairing code presented on the Raspberry Pi into your desktop window, and then you should be successfully paired.
I created a handy streaming script for my own needs to start streaming on the Raspberry Pi found below. It adds in a few extra lines to disable screen blanking such that my remote session does not freeze or become unusable if my Raspberry Pi enters standby mode. However, none of the extra lines will be necessary unless you change your /boot/config.txt to turn off the monitor when the screen blanks. Make sure to give the script execute permissions and you should be able to run it.
Check out the rest of the documentation arguments. Your settings will probably differ.
#!/bin/bash

#Disable screen saver blanking.
xset s off

#Disable Energy Star features.
xset -dpms

#Start the Moonlight stream. Make sure to replace the remote address with your own computer's IP.
#This is probably the only necessary command unless you make other changes to Raspbian
moonlight stream -1080 -60fps -bitrate 20000 -localaudio -app RemoteDesktop 192.168.1.X

#Enable screen saver blanking
xset s off

#Turn off power saving screen features.
xset s on

#Enable Energy Star features.
xset +dpms
Don’t forget! Ctrl+Alt+Shift+Q quits the streaming session.
My Problems and Solutions
My installation wasn’t very smooth. I had a lot of problems along the way that kept setting me back and extended the project duration for a couple days.
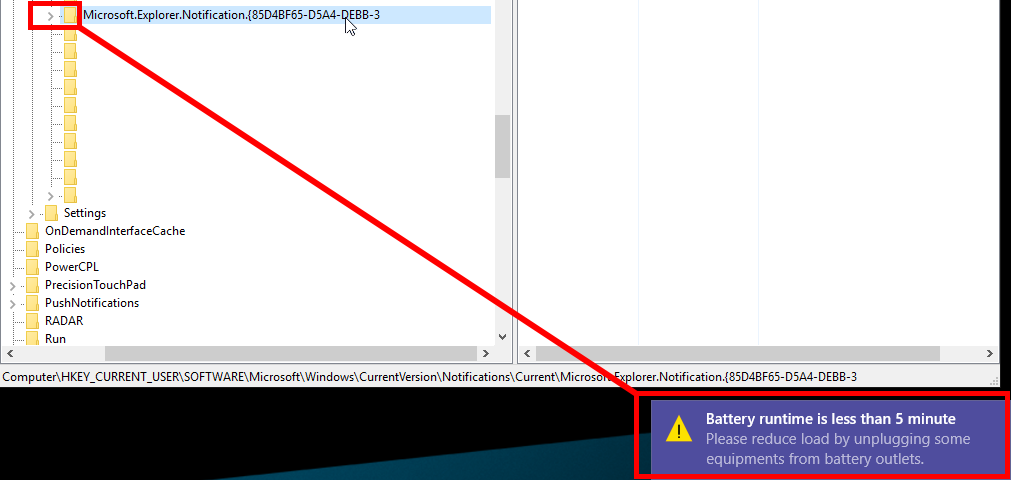
My Raspberry Pi was extremely slow at downloading.
It was not receiving enough power so I do use a different USB adapter to give it more. I didn’t realize that’s what the flashing logo on the top right corner meant. But once I did figure it out, my download speeds over my network soared past the 1 Mbit that I was getting before.
Audio would not stream.
My audio wouldn’t stream at first to my Raspberry Pi because I wasn’t using the -localaudio flag. This meant that the primary sound device was changing, then SteamVR was also attempting to change the primary audio device to the HTC Vive, and they were both conflicting with each other. If I did manage to have it to stream to the special Nvidia audio driver, I found it to stutter quite a bit. So I resolved this issue by using the local audio flag to prevent my sound device from changing, and mirroring the SteamVR audio to my primary sound driver on my computer.
Wireless streaming stuttered every 60 seconds for 10 seconds.
I was able to get my 5 GHz wireless adapter working after uninstalling the newly introduced DHCPCD wireless manager and switching to WICD. I also added “max_usb_current=1” “/boot/config.txt” to prevent my wireless adapter from using all available power from the USB ports. Everything works flawlessly now over wireless.
My HDMI monitor would not turn off after screen blanking with the Pi.
I added the undocumented/unsupported hdmi_blanking 1 to the bottom of my /boot/config.txt file and rebooted. This allowed my monitor to enter standby mode when the Raspberry Pi screen blanked.
If my monitor turned off in a remote session, I could not turn it back on without killing the session.
Because I enabled the ability for the monitor to shut down when the screen blanked off, if I was in a remote session and my Pi entered standby mode, I would be unable to escape because my Pi did not see any wake events as they were all being handed off to my remote session. My solution to this was just a bit more of a lazy hack. I decided to create a script (listed above) that turns off the power saving features before I enter streaming modesave file and restore them after ending the stream. This ensures that I will not get stuck with a monitor in standby while streaming.
I had buffering issues.
The stream no longer freezes on me after getting the 5 GHz adapter working and the compression artifacts are extremely minimal. It looks great in 1080p/60 FPS.