Transforming an Old Doorbell with Smart Alerts
Kyle Niewiada on July 03, 2022
5 Minute Read | Medium project
Updated on May 29, 2025
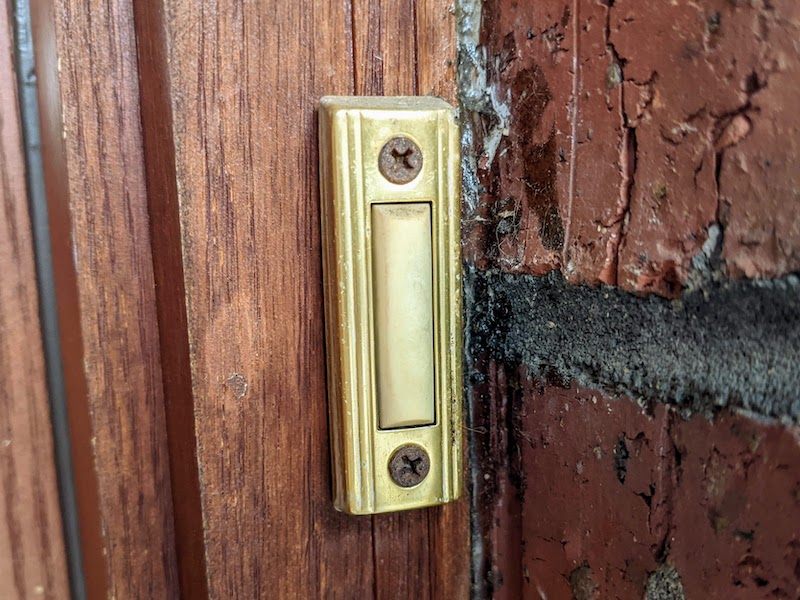
For the last year I’ve been retrofitting tech into our home. Our house is the epitome of luxury featuring a ragged carpeted wall to promote sound deadening. Due to this ingenious addition, it’s difficult to hear things like the doorbell while we’re watching TV or in a meeting.
How do we solve this? Take out the carpeted wall and make the doorbell louder. NO. We make the doorbell smart 🧠 and take pride it doing it ourselves!
This is going to be super casual.
It will be a pretty high level overview at getting Shelly 1 relays to intercept my doorbell signals. I will skip over things like how to flash ESPHome onto the Shelly relay.
It’s really to allow users near this ecosystem to steal from my project. Just like how I stole some ideas from Frenck.
Goals
- Get alerts on our devices when the doorbell rings
- Ability to discern our different doorbells
- Avoid subscription costs
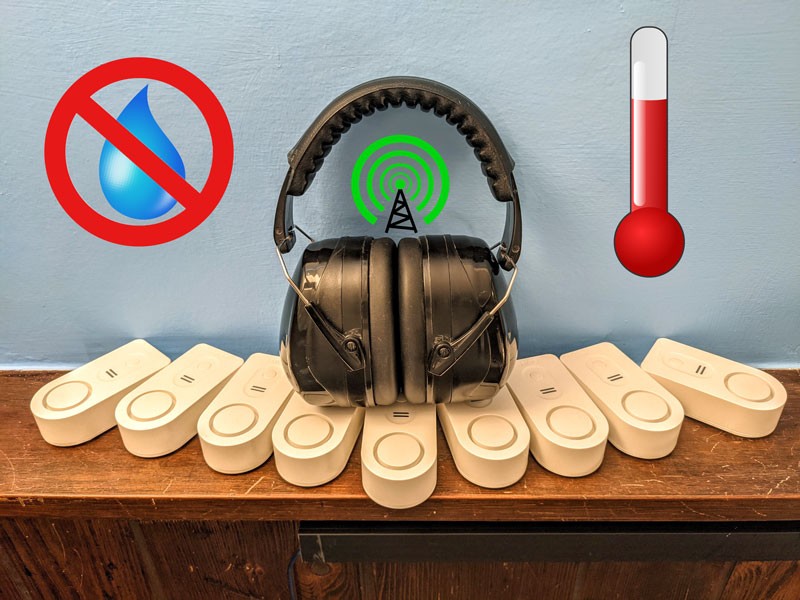
- Ability to silence the doorbell chime
- Create a repeating doorbell alarm for
no good reasonfun
Requirements
Hardware Requirements
Here’s an approximation for the hardware costs involved with the project.
- $35: 2x Shelly 1 (one for each doorbell)
- $15: Low voltage power supply (couldn’t run it off of transformer in my case, but others might be able to)
- $10: Low voltage wire to power Shelly 1
- $15: (Optional) Fancy junction box so wires don’t hang everywhere
I used a waterproof junction box because the doorbell wiring was too close to the main water line for my comfort. It helps me sleep better.
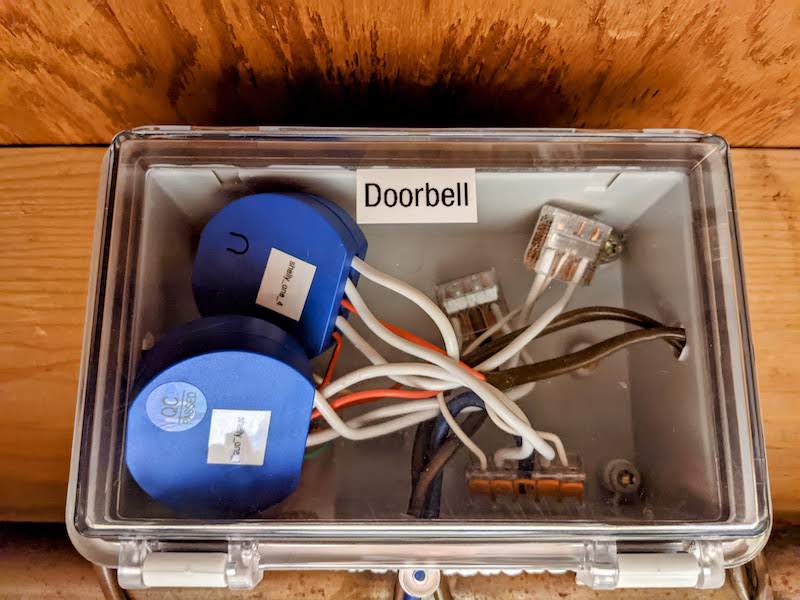 Wiring a Shelly 1 for each doorbell
Software Requirements
This guide is going to assume the user is familiar with Home Assistant and ESPHome. If they are not, check them out! Those are great projects.
- Home Assistant (I’m running the
2022.6release at the time of writing) - ESPHome flashed onto a Shelly 1
Setup
Two Shelly Relays?
If you’ve read the hardware requirements above, you might be asking yourself “Why are there two Shelly 1 relays? Surely you don’t need that.”
You’d be right! However, did you know some homes have two doorbells? I guess the thought is that you put the second doorbell by your back door in case a neighbor is stopping by.
When this happens, a chime box can be wired to give each doorbell a different chime (Ding vs Ding Dong) allowing the homeowner to know which door their visitor is at. Neat!
Except our second doorbell is also in the front of our house.. just 15 steps from the first doorbell. We’ve had people ring our second doorbell before, so we’re just going to proceed supporting it because I think it’s bougie. 😎
Shelly 1 Configuration
Mentioned earlier, we’re going to use ESPHome to configure our Shelly 1 relays.
There are 5 inputs on the Shelly 1 relay.
Line&Neutralfor powerInput&Outputfor the signal we’re controllingSwitchto communicate changes to the Shelly 1
The Shelly 1 relay will be powered from our low voltage wires (or really, whatever you can find for the line and neutral).
We’ll connect the Shelly 1 input connector to the doorbell transformer power. That power (when switched on) will travel through the Shelly 1 output connector, triggering the chime box.
Finally, the doorbell button signal will be captured by the Shelly 1 switch input.
Capturing the doorbell signal with the switch input accomplishes two things.
- We now know via software that the doorbell was pressed since we triggered it via the Shelly
switchinput. - Because we’re choosing to pass the signal onto our doorbell chime, we can also choose not to pass the signal along 🔇.
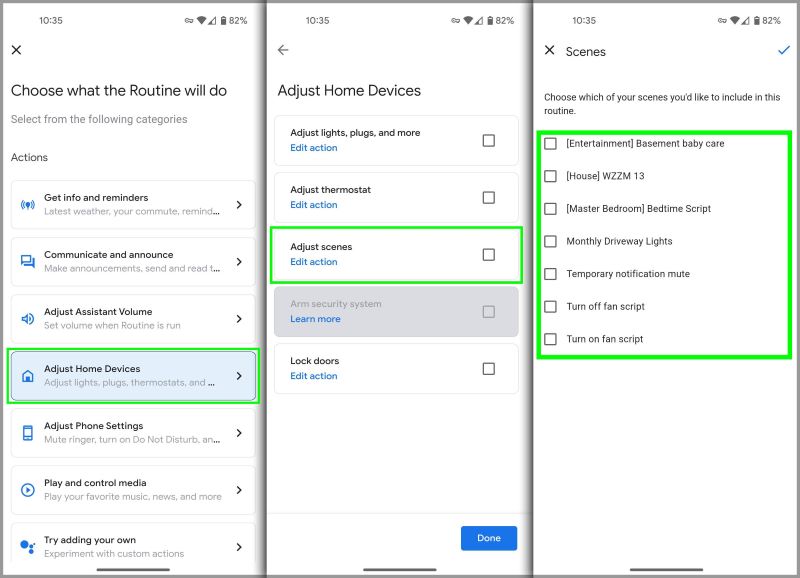
I’ve added functionality to mute the doorbell chime via an exposed input. It’s useful to pair with bedtime routines to keep the house quiet.
🏅 Achievement unlocked: Muting a doorbell
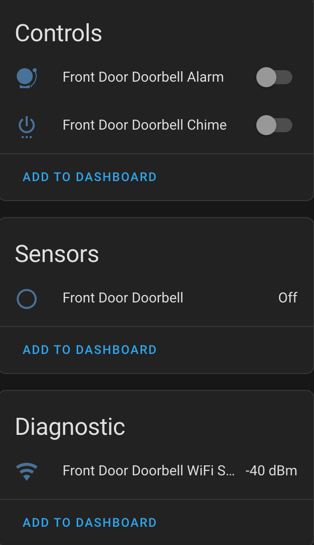 Home Assistant dashboard of Front Door Doorbell
But we can take that a step further. Since we’re in control of when our doorbell chimes, why not have some fun with that power? In the ESPHome config below, I’ve included a little script that will repeatedly trigger the doorbell chime for 30s when toggled on. DING-DONG.. Ding-Dong.. ding-dong.. After 30s, the script should stop toggling the relay.
Why have I done this? I’m not really sure. It just seemed like a fun idea. Maybe you enjoy making dogs bark, annoying your significant other, or pretending to have a high-tech burglar alarm to annoy them away.
It’s probably a bad idea. But don’t let that stop you! Just be careful of burning out your relay or doorbell chime. I’m at least 20% sure it’s not meant to operate like that (hence the 30s cap).
🏅 Achievement unlocked: Annoying as bell
#
# Basic Config
# shelly-one-01
# Front Door Doorbell
# Updated for 2025.5.0

substitutions:
  board_id: shelly-one-01
  name: front-door-doorbell
  friendly_name: Front Door Doorbell

wifi:
  ssid: !secret wifi_ssid
  password: !secret wifi_password

  # Enable fallback hotspot (captive portal) in case wifi connection fails
  ap:
    ssid: "${board_id} Hotspot"
    password: !secret ap_hotspot_password

# Enable captive portal if wifi ever changes
captive_portal:

# Enable Home Assistant API
api:
  encryption:
    key: !secret encryption_pre_shared_key

ota:
  platform: esphome
  password: !secret ota_password

esphome:
  name: ${name}
  comment: ${board_id}
  friendly_name: ${friendly_name}

esp8266:
  board: esp01_1m

# Global to store the on/off state of the chime
globals:
  - id: chime_var
    type: bool
    restore_value: true
    initial_value: 'true'
  - id: chime_alarm_var
    type: bool
    restore_value: false
    initial_value: 'false'

# Enable logging
logger:

time:
  - platform: homeassistant
    id: my_time

# Sensors that the ESPhome unit is capable of reporting
sensor:
  - platform: wifi_signal
    name: "WiFi Signal"
    update_interval: 300s

binary_sensor:
  - platform: gpio
    pin:
      number: GPIO5
    name: None
    filters:
      - delayed_on: 100ms
      - delayed_off: 25ms
    on_press:
      # Only turn on the chime when it is active.
      then:
        if:
          condition:
            - switch.is_on: chime_is_enabled
          then:
            - switch.turn_on: relay
    on_release:
      # On release, turn of the chime.
      - switch.turn_off: relay

switch:
  # Switch to enable/disable chime when
  # doorbell button is pushed.
  - platform: template
    id: chime_is_enabled
    name: Chime
    icon: mdi:power-settings
    restore_mode: DISABLED
    turn_on_action:
      - globals.set:
          id: chime_var
          value: 'true'
    turn_off_action:
      - globals.set:
          id: chime_var
          value: 'false'
    lambda: |-
      return id(chime_var);
  - platform: template
    id: chime_alarm
    name: Alarm
    icon: mdi:alarm-bell
    restore_mode: DISABLED
    turn_on_action:
      - globals.set:
          id: chime_alarm_var
          value: 'true'
      - script.execute: alarm_script
      - delay: 30s
      - switch.turn_off: chime_alarm
    turn_off_action:
      - globals.set:
          id: chime_alarm_var
          value: 'false'
    lambda: |-
      return id(chime_alarm_var);
  - platform: gpio
    id: relay
    internal: true
    name: Doorbell Switch
    pin: GPIO4
    restore_mode: RESTORE_DEFAULT_OFF

script:
  - id: alarm_script
    then:
    - while:
        condition:
          lambda: |-
            return id(chime_alarm_var);
        then:
        - switch.turn_on: relay
        - delay: 500ms
        - switch.turn_off: relay
        - delay: 500ms
#
Alerts for All
Great, we have a chime that we can add into Home Assistant. That’s not very useful yet. So let’s add notifications!
I also happen to have a camera by the doorbell, so I include a camera snapshot in my notifications.
Using the companion Home Assistant app on our phone, we can push notifications to our device using the notify service.
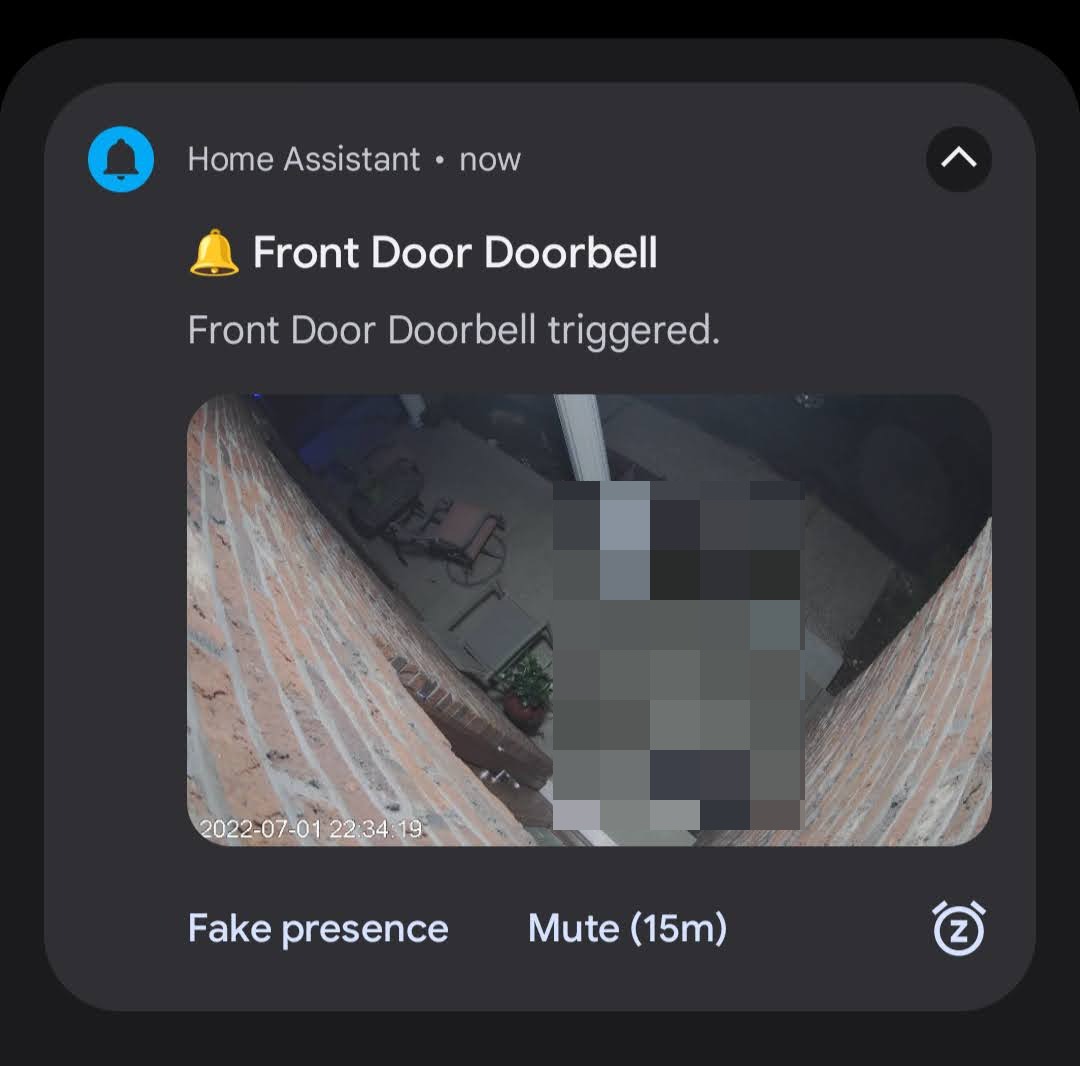 Simulated phone notification from a doorbell press
If we use an Android TV, we can also use the nfandroidtv integration in order to display alerts on our TV.
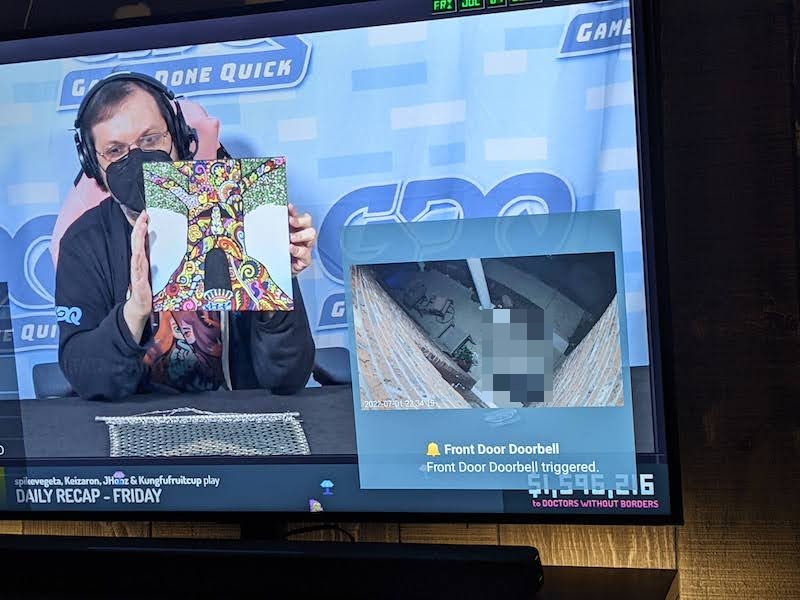 Simulated Android TV notification from a doorbell press
Here’s a useful Home Assistant automation blueprint that I use to configure my doorbells and notify my various devices.
There’s probably a better way to send the images without saving them to the disk in different locations. But it’s malleable enough that I can tweak settings without too many breaking changes.
#
blueprint:
  name: Doorbell Alert Notifications
  description: >
    This automation blueprint creates a camera snapshot if doorbell is detected
    and sends a notification to your device with the picture.

    Requirements:
      - Add `- /tmp` to `allowlist_external_dirs:` in the `configuration.yaml`

    Required entities:
      - Doorbell sensor (binary_sensor in None class)
      - Camera entity
      - Notify device entity

  domain: automation

  input:
    doorbell_sensor:
      name: Doorbell sensor
      description: The sensor which triggers the snapshot creation (domain binary_sensor).
      selector:
          entity:
            domain: binary_sensor

    camera:
      name: Camera
      description: The camera to create the snapshot (domain camera).
      selector:
        entity:
          domain: camera

    camera_delay:
      name: (Optional) Camera Delay
      description: Delay after doorbell before taking a snapshot from the camera. Useful when your camera stream has a bit of lag.
      default: 1
      selector:
        number:
            min: 0
            max: 15
            unit_of_measurement: seconds
            mode: slider

    snapshot_delay:
      name: (Optional) Snapshot Delay
      description: Delay before sending the notification after writing the camera snapshot to disk.
      default: 1
      selector:
        number:
            min: 0
            max: 15
            unit_of_measurement: seconds
            mode: slider

    rate_limit:
      name: (Optional) Rate Limit
      description: How many seconds to wait before we can send another notification.
      default: 10
      selector:
        number:
            min: 0
            max: 60
            unit_of_measurement: seconds
            mode: slider

    notification_title:
      name: (Optional) Notification title
      description: 'Default: "🔔 {{doorbell_sensor_name}}"'
      default: "🔔 {{doorbell_sensor_name}}"

    notification_message_standard:
      name: (Optional) Notification Standard message
      description: 'Default: "{{ doorbell_sensor_name }} triggered."'
      default: "{{ doorbell_sensor_name }} triggered."

trigger:
  platform: state
  entity_id: !input doorbell_sensor
  from: "off"
  to: "on"

variables:
  doorbell_sensor: !input doorbell_sensor
  doorbell_sensor_name: "{{ states[doorbell_sensor].name }}"
  camera: !input camera
  notification_title: !input notification_title
  snapshot_delay: !input snapshot_delay
  camera_delay: !input camera_delay
  rate_limit: !input rate_limit
  snapshot_file_path: "/config/www/tmp/snapshot_{{ states[camera].object_id }}.jpg"
  snapshot_image_path: "/local/tmp/snapshot_{{ states[camera].object_id }}.jpg"
  notification_message_standard: !input notification_message_standard

action:
  - delay: "{{ camera_delay }}"

  - service: camera.snapshot
    entity_id: !input camera
    data:
      filename: "{{ snapshot_file_path }}"

  - delay: "{{ snapshot_delay }}"

  # Update this service group with whomever you'd like to notify
  - service: notify.family
    data:
      title: "{{ notification_title }}"
      message: "{{ notification_message_standard }}"
      data:
        ttl: 0
        priority: high
      data:
        notification_icon: mdi:bell
        group: doorbell
        channel: doorbell
        push:
          interruption-level: time-sensitive
        image: "{{ snapshot_image_path }}"

  # Update this service group with whomever you'd like to notify
  - service: notify.screens
    data:
      title: "{{ notification_title }}"
      message: "{{ notification_message_standard }}"
      data:
        duration: 10
        image:
          path: "{{ snapshot_file_path }}"

  - delay: "{{ rate_limit }}"

mode: single
max_exceeded: silent

#
Final Thoughts
I don’t think I’m a luddite, but sometimes I really appreciate older things. Who knows, maybe I’ll come around to buying a video doorbell once they are better looking.
It’s super useful to get alerts when I’m busy, away from home, or have the ability to mute alerts while the baby naps.
I had an existing doorbell, existing camera, and accessible wiring. With a little bit of fun, I was able to transform (pun intended) our doorbell setup into something I’d seen advertised by other smart doorbells. But doing it myself makes me happy.