Electric Dryer Monitoring with a CT Clamp
Kyle Niewiada on September 20, 2020
3 Minute Read | Small project
Updated on May 29, 2025
In July I wrote about a project on how I monitored my washer and dryer cycles. My washer used an ESP32 smart plug while my dryer had an ESP32 board and vibration sensor adhered to the outside paneling. At the time, I believed the shortcomings of a vibration sensor would be overcome by its low cost and fast deployment time. As a developer, I should have probed my methods before proceeding but I wanted to deploy first and ask questions later.
Two months later it is clear I made the wrong choice.
This post is meant to serve as an addendum. If interested, you can read about how I previously used a vibration sensor to track my electric dryer state.
Reflecting
Using a vibration sensor to monitor my dryer state was not a terrible idea. As I called out previously, it was an extremely cheap solution that did not require electrical knowledge to deploy. I did not need to understand the how split-phase electricity worked or worry about electrocuting myself.
But the vibration sensor monitoring ended up wasting more time than it was worth. If there was movement from my nearby washer– it triggered. If there was a phantom resonance frequency– it triggered. If my dryer loads were too small– it would fail to trigger.
In the month of July, I was receiving approximately one incorrect notification a week. Each time an improper notification was sent I would recalibrate the vibration sensor and debug the new readings from a phantom dryer load.
If I need to babysit an automation, it has failed.
Failing Forward
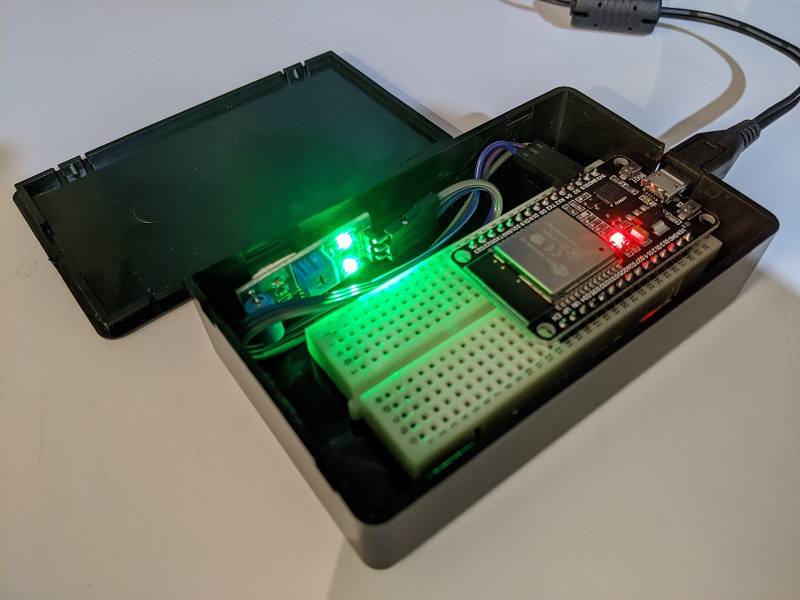
After my fifth week of inconsistent notifications, I pulled the trigger and ordered a CircuitSetup Split Single Phase Energy Meter kit.
- ✔️ Open source hardware/software
- ✔️ Monitors energy with CT clamps
- ✔️ Interfaces with ESPHome (ATM90E32)
- ✔️ Available as a completed kit
- ❌ Significantly more expensive than a vibration sensor
- ❌ Requires a base electrical understanding to safely deploy
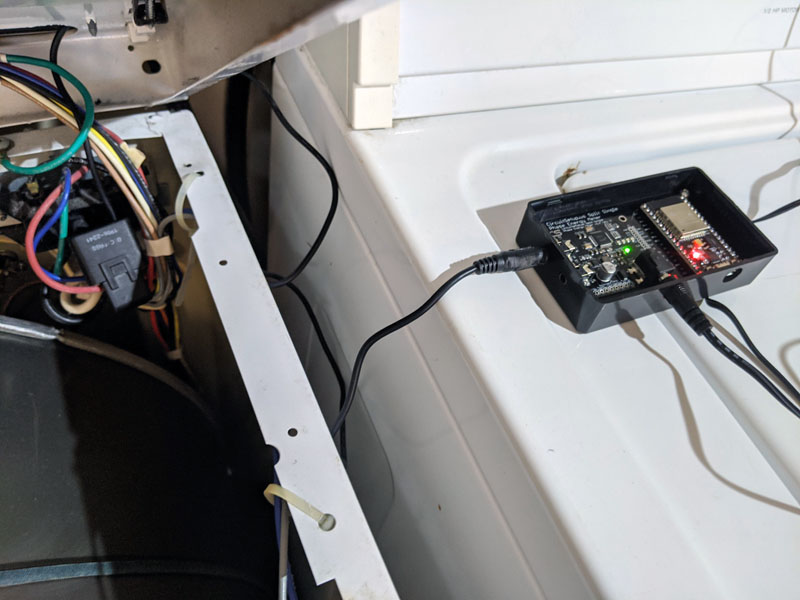
After studying the wiring diagram for my electric dryer and learning about US split-phase circuits, hooking up the new gear was straightforward. I flashed my custom ESPHome firmware to the board and ran a test load. Perfect unequivocal monitoring.
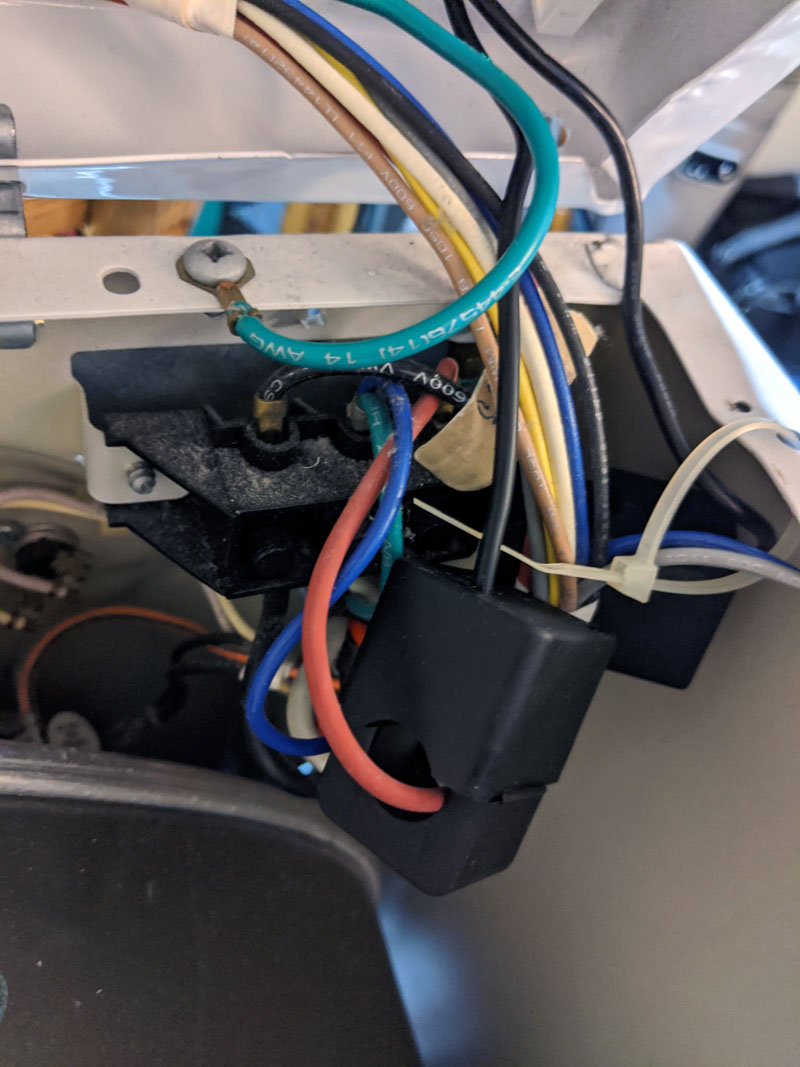 CT Clamp for monitoring the dryer power consumption
Here are the important ESPHome sensor configurations from my deployment.
substitutions:
  devicename: Dryer

spi:
  clk_pin: 18
  miso_pin: 19
  mosi_pin: 23

# Sensors that the ESPhome unit is capable of reporting
#  Calibration values sourced from GitHub meter library
#  https://github.com/CircuitSetup/Split-Single-Phase-Energy-Meter/blob/master/Software/EmonESP/src/energy_meter.h#L55-L75
sensor:
  - platform: wifi_signal
    name: "WiFi Signal"
    update_interval: 300s
  - platform: atm90e32
    cs_pin: 5
    phase_a:
      voltage:
        id: CT1_voltage
        name: "Line Voltage"
      current:
        id: CT1_current
        name: "CT1 Current"
      power:
        id: CT1_power
        name: "CT1 Power"
      gain_voltage: 3920 # For Meters >= v1.4 rev.3
      gain_ct: 39473
    # Library states phase_c is used for CT2 on single split-phase meter on this specific board
    # phase_c:
    #   current:
    #     id: CT2_current
    #     internal: true
    #     name: "CT2 Current"
    #   power:
    #     id: CT2_power
    #     internal: true
    #     name: "CT2 Power"
    #   gain_voltage: 3920 # For Meters >= v1.4 rev.3
    #   gain_ct: 39473
    frequency:
      internal: true
      name: "Line Frequency"
    line_frequency: 60Hz
    gain_pga: 4X
    update_interval: 3s
  - platform: template
    name: "Power"
    id: calculated_power
    unit_of_measurement: "W"
    icon: "mdi:flash"
    # Ignore any anomalous states below 2W
    lambda: |-
      if (id(CT1_power).state < 2) {
        return 0.0;
      } else {
        return id(CT1_power).state;
      }
    update_interval: 3s

binary_sensor:
  - platform: template
    name: "Running"
    filters:
      - delayed_on_off: 10s # Avoid extra alerts when opening dryer door to check status
    lambda: |-
      if (id(CT1_power).state >= 10) {
        // Dryer is running
        return true;
      } else {
        // Dryer is off
        return false;
      }
Wiring Explained
I am not an electrician. The information below is my current (pun intended) understanding on how the circuits work. I have done my best to research the basic ideas in split-phase circuits in US homes but I lack confidence to demonstrate further knowledge.
The following is my understanding on how my specific appliance operates. My 240V electric dryer plugs into a NEMA 14-30R. According to the dryer wiring schematic, it uses the L1 (Hot) and L2 (Hot) lines for the dryer heating element while the drum motor runs between L1 (Hot) and Neutral. To calculate the total power consumption I need to measure the current on L1 (Hot) since it includes both the dryer heating element and the drum motor.
It should look something like this.
 Simplified split-phase 240V circuit for my electric dryer and motor.
I chose to take the default calibration values provided by the CircuitSetup library for my hardware since it was shipped as a kit. My numbers are only close estimates unless I calibrate them myself. However, even if the numbers are leagues off, the primary requirement of detecting the dryer running is satisfied.
Final Thoughts
I am pleased with my updated dryer monitoring solution. There is no more ambiguity when I am alerted. I should have used the CT clamps from the start, but I wanted to see if I could get away with a cheaper budget. It turns out that the vibration sensor had too many concessions for my liking. At least my CT clamp solution is forward compatible with minimal modifications. If my dryers are using electricity to run, I should be able to monitor them for the foreseeable future. 🔮