Using Vibrations and Power to Notify When My Washing Machine and Dryer Finish
Kyle Niewiada on July 26, 2020
7 Minute Read | Small project
Updated on May 29, 2025
My washing machine and dryer do not have an audible notification upon completion. When they finish they go silent 🔇. Because I live in a small space, I usually shut the door to the laundry room to reduce noise leakage in the main living area. On more than one occasion I have missed the end of the washer/dryer cycle because other ambient noises mask them. Rather than letting the clothes wrinkle up in the dryer or stay forgotten overnight in the washer, I would rather receive an audible alert upon a cycle completion.
The process of detecting the completion state of each appliance is its own task.
🧼 Identifying the Washing Machine State
This one is easy. To detect the running state of the washing machine I need to monitor the power consumption on the standard wall plug.
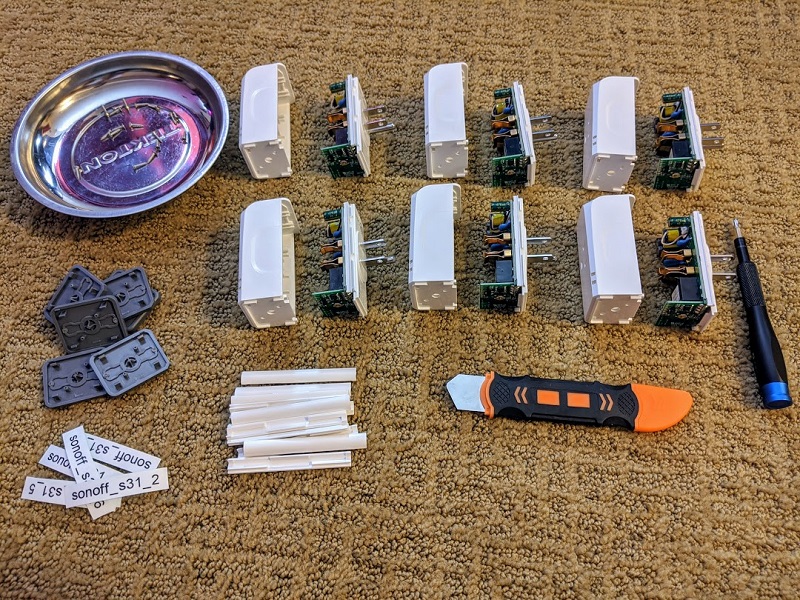
In my last blog post I wrote about how I deployed a handful of ESPHome smart plugs. One of those plugs became a dedicated device to monitoring the power consumption of the washing machine. After running one cycle to see a baseline power usage, I was able to determine that at no point during any cycle does the washing machine drop below 3 W of power consumption.
Since my plug is running ESPHome, I just need to add a new binary_sensor to the device based on the plug’s power consumption.
binary_sensor:
  - platform: template
    name: "Running"
    filters:
      - delayed_off: 15s
    lambda: |-
      if (isnan(id(power).state)) {
        return {};
      } else if (id(power).state >= 2) {
        // Running
        return true;
      } else {
        // Not running
        return false;
      }
♨️Identifying the Dryer State
Update (2020-09-20): After a month of using the vibration sensor with the dryer outlined below, I decided to switch to using a clamp style split phase energy meter. If you’re interested in my current monitoring method, you can read about my post here.
Tracking the state of the dryer is a bit trickier. Since the dryer is connected to a 240V outlet, it essentially eliminates any reasonably priced smart plug.
This left me with four options (that I could come up with):
- Open the dryer and hook up a CT clamp (magnetic induction sensor) to the 240V hot wire
- Open the dryer and connect a NodeMCU sensor input to a nonlethal connector on the main circuit board
- Throw a wireless sensor on the drum and track when it stops moving (or a handful of nickels so I can hear it better
/s) - Mount a vibration sensor to the side of the dryer and detect when the dryer stops shaking
Reviewing Dryer Status Options
I chose to use option 4, the vibration sensor. Let us walk through each idea above to figure out why I went with that solution.
1. Open the Dryer and Attach a CT Clamp
Originally I thought using a CT clamp was going to be a good idea. In the end I opted against it. Ordering a CT clamp and another board to read data from it would require more parts that I didn’t feel like purchasing. I am also not too comfortable working around devices that are running 240V. I am sure everything would have been fine considering the CT clamp is a passive sensor, but the added costs caused me to choose a different option. I might revisit this option someday.
2. Connecting a NodeMCU to the Dryer Main Circuit Board
This was another reasonable idea because it is very device specific. Because I can’t easily replicate this behavior across all dryers, I ruled it out early on.
My dryer does not have a digital display. In fact, it does not even have a light for the inside drum when you open the door. It is lacking quite a few features. The dryer strongly follows the “keep it stupid simple” policy.
If I were to connect a NodeMCU to the main circuit board, I would have to spend time figuring out which leads to run a sensor to. This is probably the clean approach, but I wanted to avoid a solution that was device specific. Whatever solution I came up with needed to be generic for anyone to replicate in the future.
Keeping it generic also reduces the “re-factoring in real life” when the dryer gets replaced someday…maybe.
3. Using a Wireless Sensor on the Drum to Track Gyro Movement
Truthfully, I am not that interested in using a low powered wireless sensor. This is just another device to charge and keep track of. If I have to think about it and manage it, it’s not really automated anymore.
4. Using a Vibration Sensor
The last solution I am going to describe is using a vibration sensor to track the completion of the dryer. While researching ways that people have tracked their dryer status, one of the fun ways mentioned has been using a vibration sensor.
It is a simple concept. You connect a vibration sensor to a NodeMCU. When the vibration sensor detects movement the sensor signal being sent to the NodeMCU will change. If the vibration is stopped for long enough, one can infer that the dryer has completed its cycle.
I really like this idea because it is generously cheap and generic enough to work on most dryers. The only exceptions I can think of are for stacked units, a really good dryer bearing that doesn’t vibrate, or an unstable room that shakes a lot.
The sensor most people use for their dryer detection is the SW-420 vibration sensor. I ended up getting a 5-pack for $7.
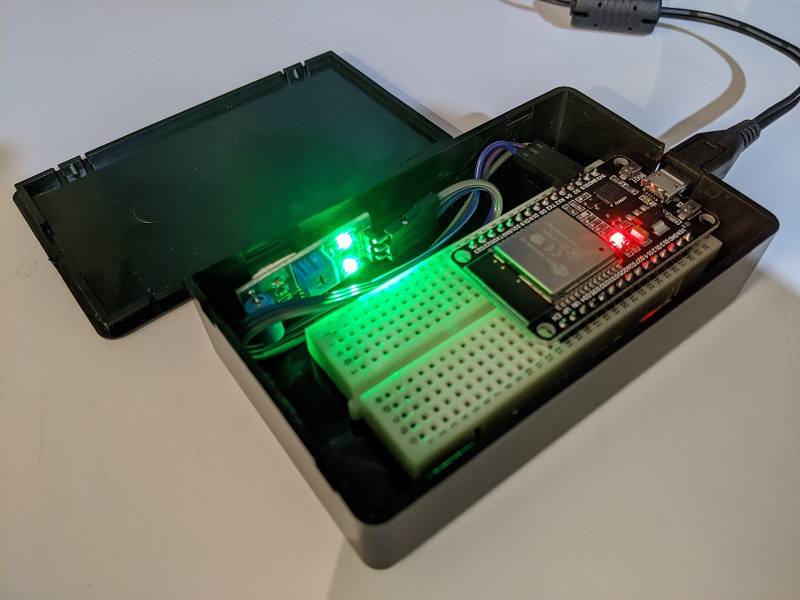
NodeMCU with SW-420 vibration sensor attached
Configuring ESPHome with the Vibration Sensor
When I see most people use a vibration sensor to track the dryer status, they consider the dryer as running when the vibration sensor is first triggered. After 15s without any re-triggers, they mark the dryer status as done.
This might be fine for people that have their dryer in a closet hidden in the back room. For me, the dryer is in a high traffic room. This means it is easy to bump the dryer sensor and create a false positive event. Other concerns include large thunder strikes and the nearby semi-trucks from a busy road that are known to set off car alarms.
To avoid false positives, I decided to treat the vibration sensor like a pulse counter. I then take a moving median window of the pulse counter rate to eliminate any outliers that are not producing consistent vibration.
Adding a moving median window does decrease the reactivity of the dryer status by approximately 10-15s. But in turn it eliminates all false positives from inconsistent vibrations.
Here are the relevant changes in ESPHome I made to my NodeMCU chip that allow it to interpret the vibrations with a moving median window.
# Sensors that the ESPHome unit is capable of reporting
sensor:
    # Handle a moving average of vibrations
    # Avoids `turning on` when bumping the dryer
  - platform: pulse_counter
    name: "Vibration Pulse Rate"
    internal: false # It may be easier to expose this when setting up and testing
    id: vibration_pulse_rate
    icon: mdi:vibrate
    update_interval: 250ms # 4x a second
    pin:
      number: GPIO15
      mode: INPUT
    filters:
    - median:
        window_size: 61 # ~15 second moving window
        send_every: 4 # Every 1 second
        send_first_at: 3

# SW-420 Vibration Sensor
binary_sensor:
  - platform: template
    name: "Running"
    device_class: vibration
    filters:
      - delayed_on_off: 120s # Avoid debounce shaking from washing machine in close proximity
    lambda: |-
      if (id(vibration_pulse_rate).state >= 240) {
        // Dryer is running
        return true;
      } else {
        // Dryer is off
        return false;
      }
I then create a binary_sensor from the pulse_counter sensor expose it to Home Assistant.
The binary_sensor helps obfuscates the of the raw pulse counter values that I do not need to send over the network. It also reduces the refactoring need in Home Assistant since the state will be determined entirely on the NodeMCU node.
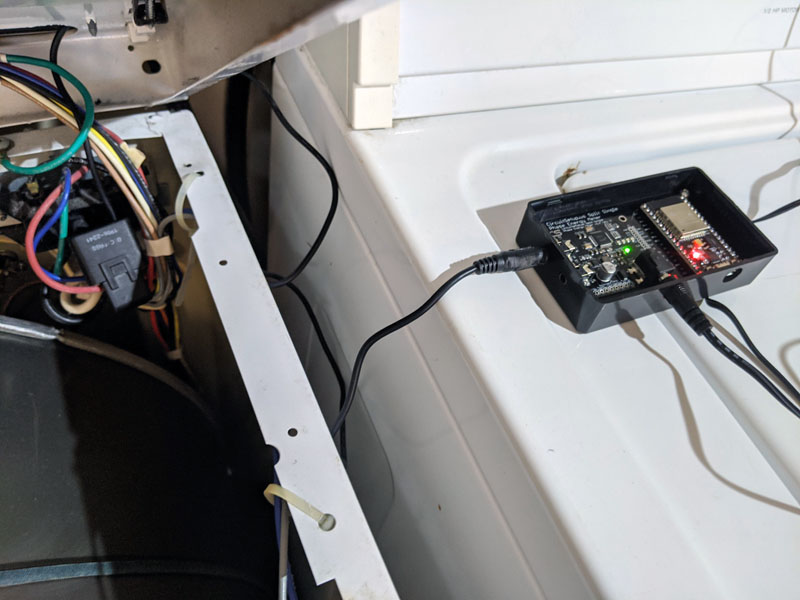
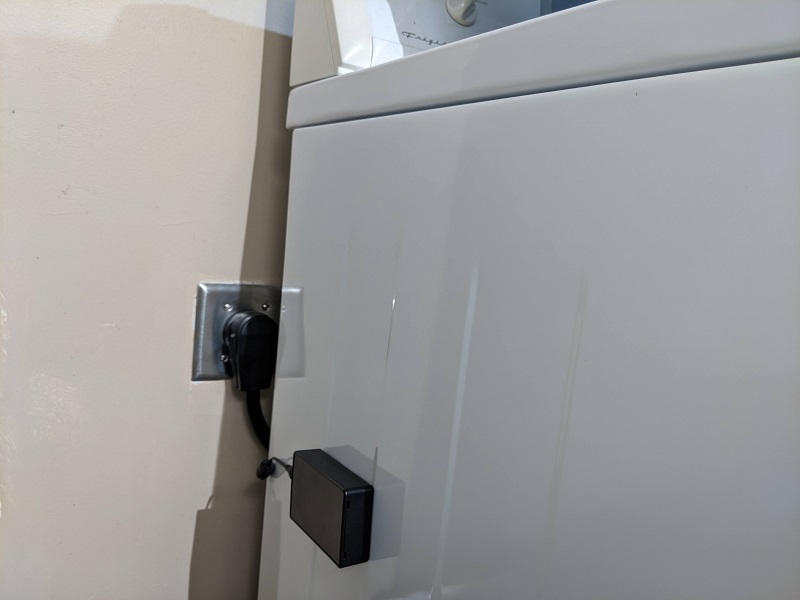 Dryer monitoring contraption installed
Notifications
Finally, after I have captured the states of the washer and dryer inside Home Assistant, I can determine how I want to broadcast the notification upon completing the washing machine and dryer cycles.
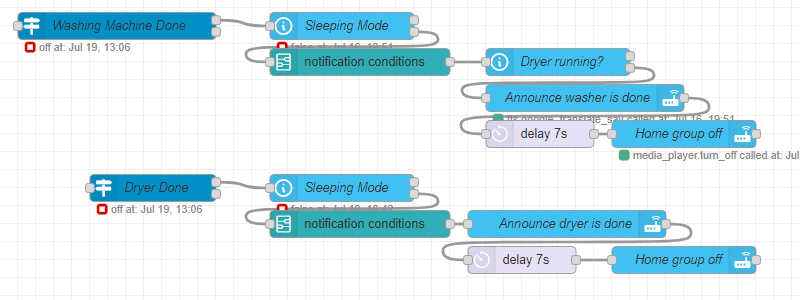 Node-RED washer/dryer notification flow
In the flow above I am using Node-RED to create the automation handling the notification alert.
The top flow checks if the washing machine state changes from on -> off.
The bottom flow checks if the dryer state changes from on -> off.
If either of those two devices are complete, it will call service within Home Assistant to broadcast a notification to all Google Homes that the respective appliance is done running.
The catch is that I do not want any alerts to be sent out unless they are actionable. What I mean is that I do not wish to be notified if the washer is done but the dryer is still running. That is because there is nothing I can do. There is nowhere to put the wet clothes yet. You can see this modification in the top flow where I restrict notifications from being sent if the dryer is still running.
Conclusion
This is an automation that I have been dreaming about for a while but have not spent the time to examine all approaches until recently.
I feel content with my low-cost approach on each appliance and I admire the fact that they are mostly generic. This will allow me to continue using these methods in the future unless there are unforeseen changes.
I have a smart way to monitor the state of the washing machine and dryer. My system sends alerts only when they are actionable and reduces the downtime between each load. An automation that increases efficiency is a pleasant one.