Bringing Home Automation Back Home
Kyle Niewiada on June 03, 2018
8 Minute Read | Large project
Updated on February 05, 2024

I’m a big fan of automation. Repetitive tasks annoy me and I try to find the best way to optimize activities. Earlier this year when Google Home rolled out custom routines, a weird behavior involving lights and routines prevented me from syncing my new Philips Hue bulbs with Google Home. This was a huge pain point for me because I always use my voice to command my lights.
My attempt at solving this problem led me into a massive project of shifting control from my smart devices wherever possible into my own hands. Granted there are still external services that are still required for a few of my devices, but this got me closer to full control. My solution was using the open source project Home Assistant.
Home Assistant is an automation platform that has +1,000 components for different devices and services. It’s written in Python3, has an active community, and openly accepts contributions into its project. Home Assistant’s large library of compatible devices made it easy for me to hook up all of my smart plugs, smart lights, and other silly smart devices. I personally run Home Assistant on Hass.io, a Docker-based system that handles Home Assistant updates and runs very well on my Raspberry Pi 3.
Table of Contents
Fixing My Lack of Light Control
When I first started working with Home Assistant, I wanted to solve only one problem. Controlling my lights using my voice. This was a two stage process. The first was connecting my lights to Home Assistant, and the second step was connecting a voice interface to Home Assistant.
Step One
Connecting up Home Assistant to my Hue Lights took less than five minutes. As soon as Home Assistant started up, its “discovery service” automatically prompted to authenticate locally on my network with my Hue hub. What a piece of cake. I could now control the lights from the Home Assistant web interface.
Step Two
Commanding my lights using my voice was another simple-ish task. All I needed to do was set up a Google Actions project and connect it to the Google Assistant component. I was already familiar with Actions on Google which made hooking this up trivial. However, I don’t use this exact component anymore because Actions on Google unpublishes test projects after a few days (which breaks my syncing). I have since switched to using Google Assistant via the Home Assistant Cloud component.
What Did I Really Fix?
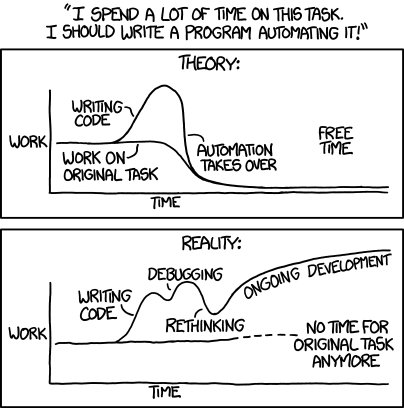 Automation (Source)
I think understand what you’re about to say; “Kyle, I thought you were trying to get away from the cloud, not build your own components in the cloud!” To that I would say you are absolutely correct! All I did was shift the cloud problem from my Google Home… back to my Google Home… huh. But remember, I can still control my devices locally if I pull up the web interface on my network… but then I could just open the Hue App on my phone. What was I solving by doing this again?
At the very least, I fixed being able to control my lights using my voice. Even if I’m using the exact same vocal interface. Plus, now I had this wonderful automation tooling that I could use streamline tasks in my apartment. Let’s break down what I use to help with my automations and a few of my favorite examples.
Automating Mundane Tasks
When I first started working on automation with Home Assistant, I was using its built-in YAML files to carry out tasks. I learned very quickly that this was extremely tedious as I had to reload my Home Assistant automations whenever I wanted to test them. It was also incredibly difficult to debug these types of automations. That’s when I came across the Home Assistant nodes for Node-RED.
The idea behind using Node-RED is that Home Assistant will maintain all of the entity states and services while Node-RED controls the conditions and behaviors from those state changes. The Home Assistant node allows me to access the Home Assistant API directly within Node-RED.
For example, my vacuuming automation inside Node-RED checks with Home Assistant to see whether or not the house is occupied or empty. When Node-RED detects that the occupancy status from Home Assistant is empty, it continues to check if the current time is within the vacuum scheduler timeframe. If it is, send a service call to Home Assistant telling the vacuum to start. This flow can be seen below.
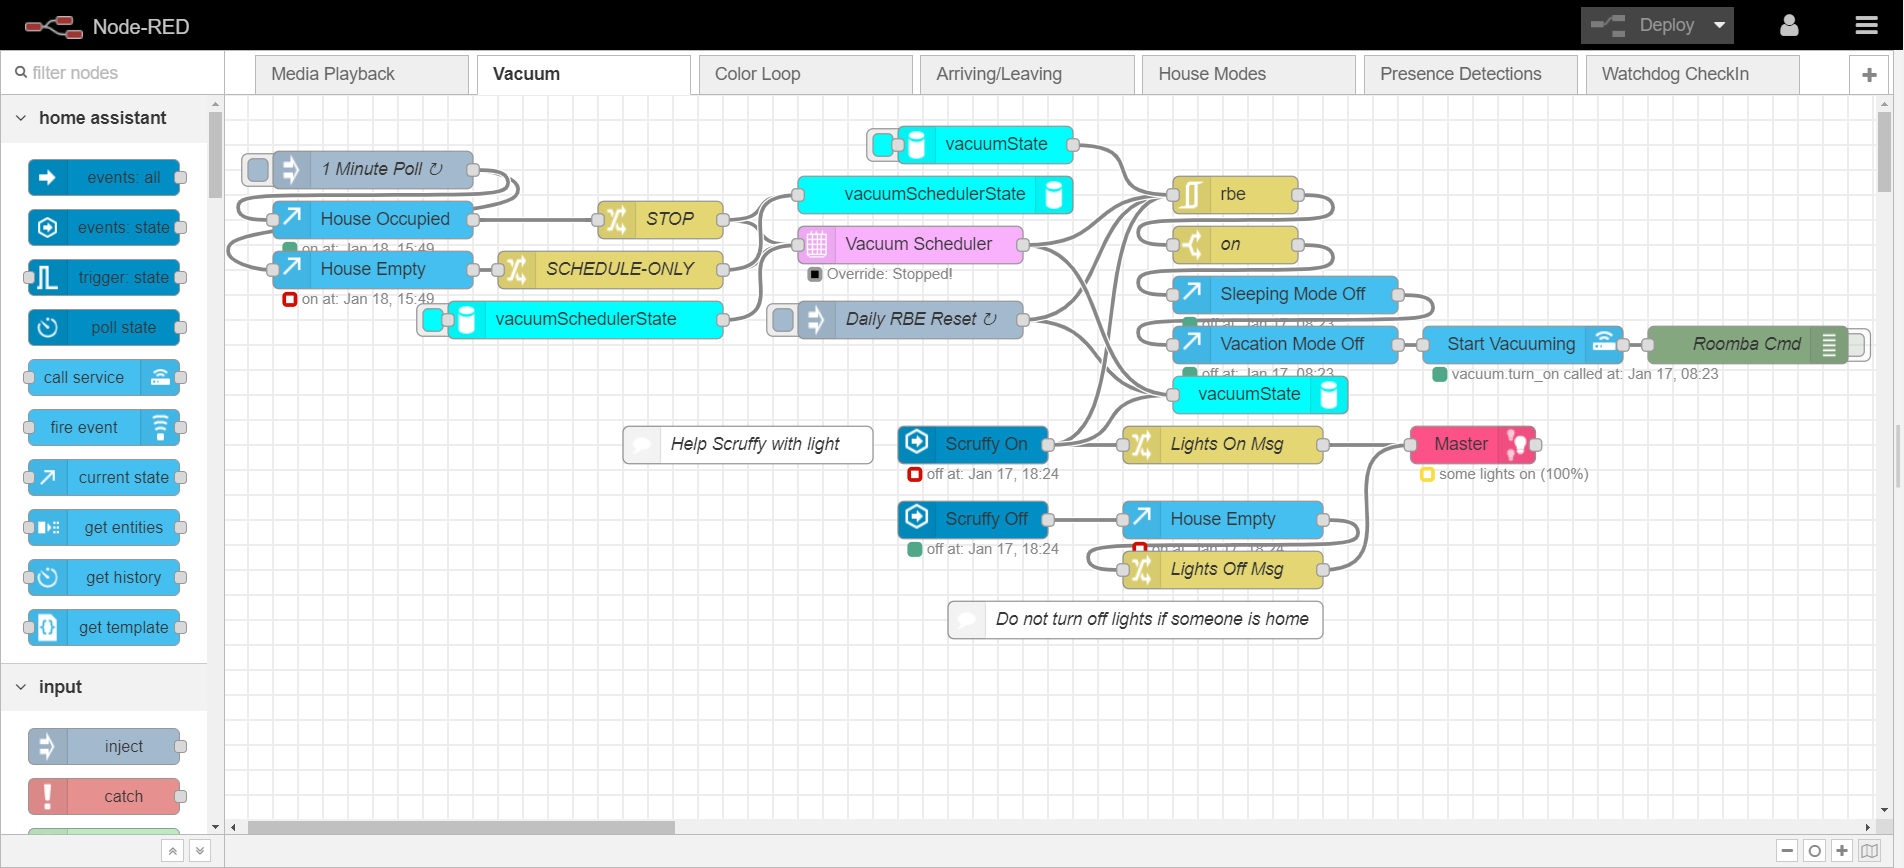 Node-RED Vacuum Flow
If you think about that xkcd comic from earlier, this is a ridiculously complicated flow when I could just ignore the vacuum automation and use its built-in scheduling. But that’s not how we do things around here, is it?
There are a few other notes on this vacuum flow. I give my vacuum the courtesy of turning on all the lights when it starts running so it can see objects in a clear view. One may also notice the node-red-contrib-persist node which maintains the last known state between flow redeploys. I also have an rbe (Report by Exception) node which allows me to ignore repeated commands. This ensures that the vacuum doesn’t schedule itself more than once per day by accident.
Be careful with this one. If you mess up and reset your trigger condition at 1 AM and it starts vacuuming, your significant other will not be very happy when they are awoken by a vacuum and bright lights. Speaking from experience…
Sample Automations
Here are a few samples of my favorite automations set up around the apartment.
Dim the Lights With Media Playback
- Dim the kitchen and living room lights if I am watching something on Plex or Chromecast.
On
pause/stop, restore the lights back to full brightness only if the sun is above a certain horizon angle.- But wait, now if someone is cooking in the kitchen while the other person is trying to watch a show, the cook will have trouble seeing. Ok, insert a
cooking modeinput_booleanto prevent dimming specific lights. Solved.
- But wait, now if someone is cooking in the kitchen while the other person is trying to watch a show, the cook will have trouble seeing. Ok, insert a
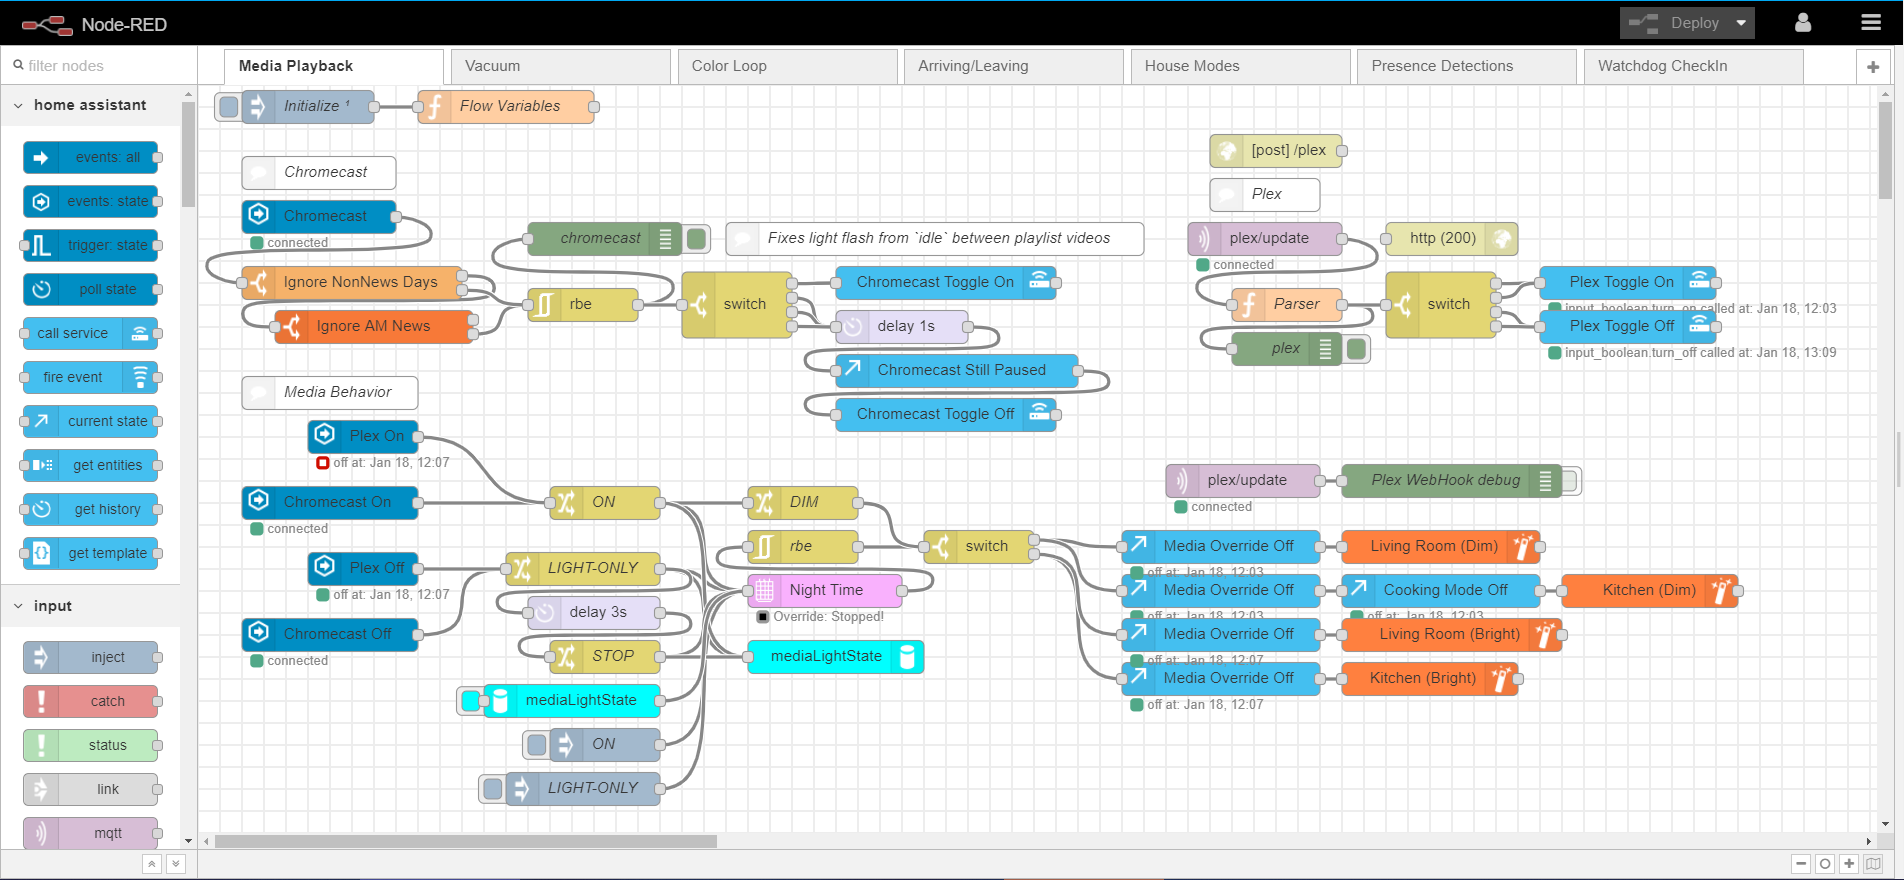 Media Playback Flow
Improving the Philips Hue Colorloop
- Create my own colorloop for Philips Hue bulbs because the built-in API colorloop effect moves nauseatingly fast.
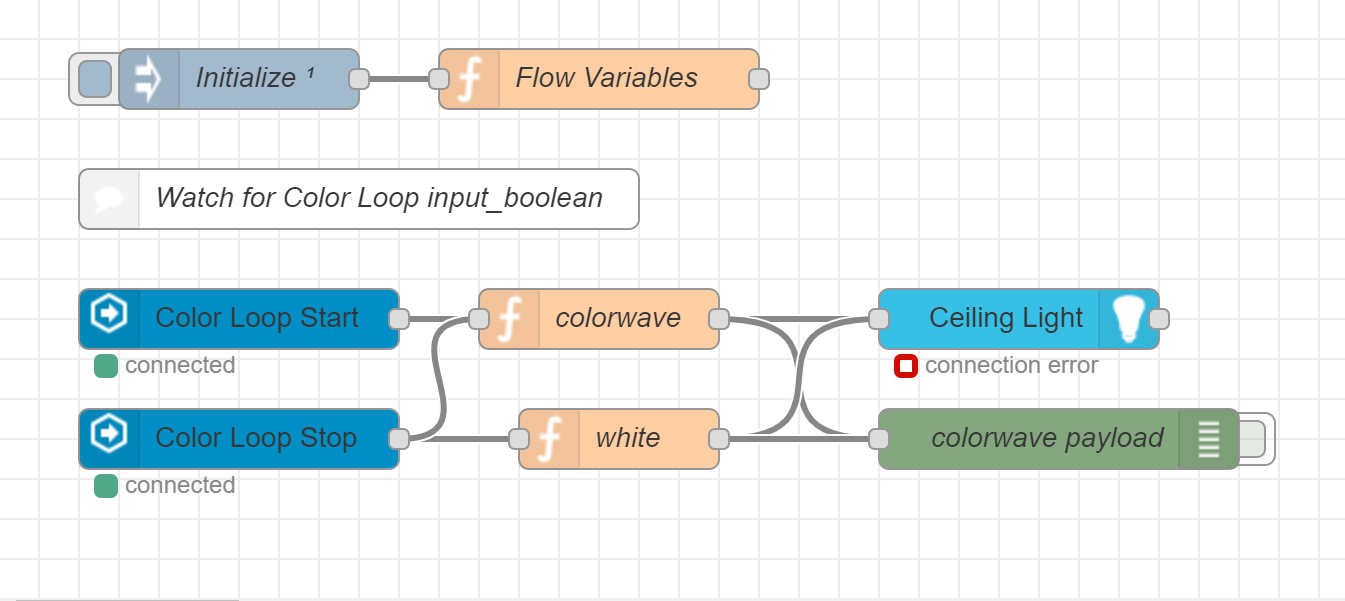 Hue Colorloop Flow
In case you’re wondering what’s inside the colorwave node, it’s a piece of JavaScript that I hacked together to rotate through the peak color coordinates on each RGB channel for the best looking light. It’s probably more complicated than it needs to be, but breaking it down like this helps me understand what each component of the code is performing. I make use of the flow variables a lot to keep the configuration parameters easy to change.
var timeout = flow.get("transitionTime") * 1000;
var rainbow = ["#FF0000", "#FF8000", "#FFFF00", "#80FF00", "#00FF00", "#00FF80", "#00FFFF", "#0080FF", "#7F00FF", "#FF00FF", "#FF007F"];

rainbowPosition = flow.get("rainbowPosition"); // Flow value that starts at 0.

if (msg.payload === "on") {
    flow.set("rainbowId", setInterval(sendColors, timeout));
}

function sendColors() {
    checkRainbowPosition();
    flow.set("rainbowPosition", flow.get("rainbowPosition") + 1);
    node.send({ payload: {"on":true, "hex":rainbow[flow.get("rainbowPosition")-1], "transitionTime":flow.get("transitionTime")} });
}

function checkRainbowPosition(){
    if ( flow.get("rainbowPosition") >= rainbow.length) {
        flow.set("rainbowPosition", 0);
    }
}
Welcoming Each Occupant Home
- When someone arrives home, turn on the lights (+ set the bedroom to their favorite color scene), and broadcast their arrival over all Google Home speakers.
We also have it set up to turn off all lights and switch to Eco mode if every person has left the apartment.
- But what if the other person is sleeping? Then we need to make sure that we add in a
sleeping modeinput_booleanthat disables the announcement and prevents changing the bedroom lights.
- But what if the other person is sleeping? Then we need to make sure that we add in a
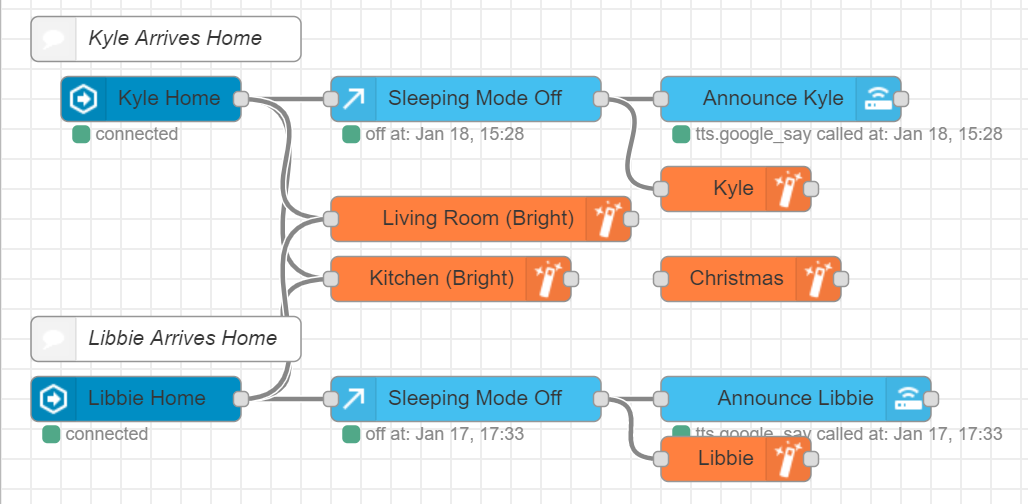 Welcome Home Flow
Morning News with a Switch
This one is a bit custom but it should give a cool idea on something to automate. I’ve found that the local news streams their broadcast online, and it is compatible with my Chromecast.
Using Node-RED, I can watch for specific button presses of my Hue light switch in the morning between 5:00 AM-7:00 AM. I use that trigger to turn my CEC-friendly TV on and cast the morning news. All with a single button press in my kitchen.
It really gives me the feeling of living in one of those future movies.
Additional Useful Home Assistant Components
- Presence Detection from Home Assistant helps identify who is home or away.
- Floorplan for Home Assistant is an interactive tool that allows a user to toggle/open/view entities from Home Assistant on a user created SVG layout of their living space.
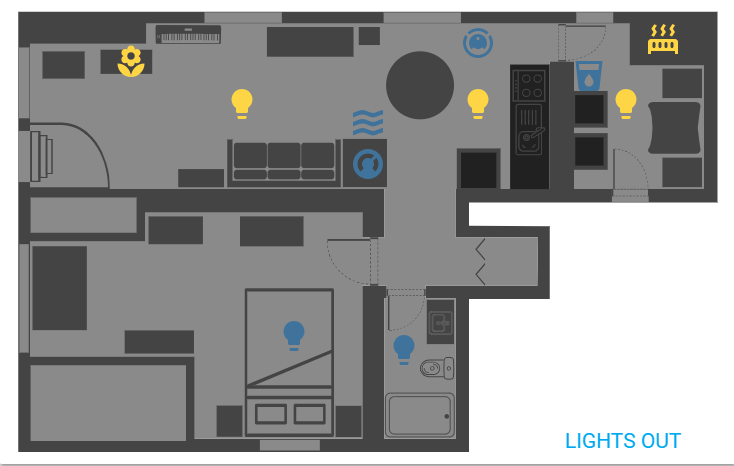 Floorplan example
Conclusion
Home Assistant and Node-RED make a wonderful pairing to control smart devices around the domicile. They have fixed many problems for me with applications like the geo-fencing from Hue, slow eco-mode for Nest, and the broken implementation of Google Home routines. Putting control back in the user’s hands of each device allows them to avoid being locked into a single ecosystem, and in some cases avoid concerns about a cloud outage for their devices. This pair makes an excellent start on bringing home automation back home.