My Easy In-line USB Power Switch
Kyle Niewiada on March 15, 2016
2 Minute Read | Small project
Updated on February 05, 2018

I had a USB microphone that was plugged into my computer; it was on at all times. If I was watching a movie, the blue glow from beneath the microphone mesh would illuminate my desk.
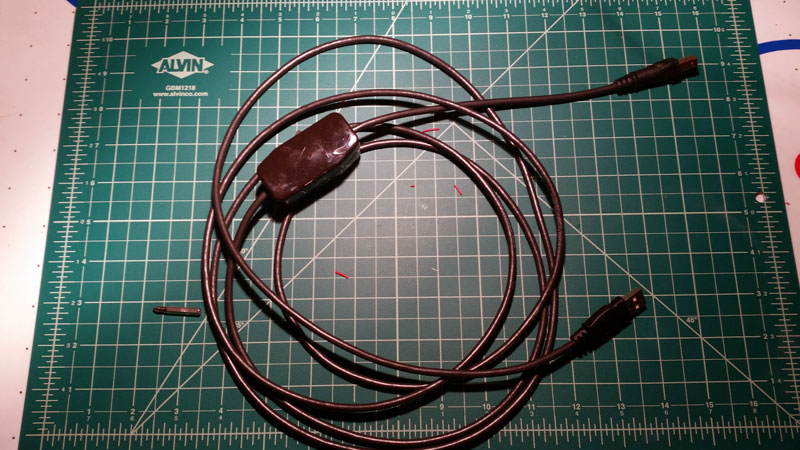
Rather than wear out the durability of my USB connector with 1,500 mating cycles [1], I decided to add an in-line power switch to the USB cable. My idea was to add the same kind of switch used in retrofitting old lamps.
I am almost positive (electric joke) that most people have done something similar to this before. When I take a quick look on Amazon, I can find USB micro cables with in-line power switches. However, none for USB 2.0 A->B connectors. So I made one myself.
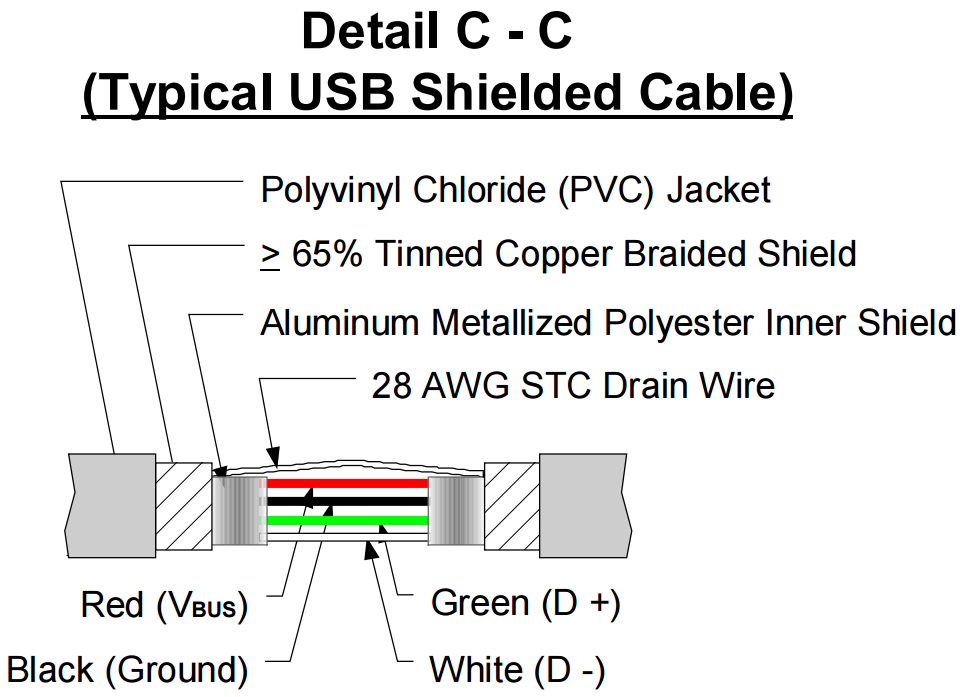
The USB 2.0 specification layout gave me a definition to what each wire inside the cable should be (assuming I can’t guess). The red wire carried the power, and that was the wire I was going to use in my switch. The black wire was the ground, the green wire was for data in positive, and the white wire was for data in negative.
 https://en.wikipedia.org/wiki/USB
I used my X-Acto knife with #2 blades and wire strippers to tear open the shielding on a cable and strip away the wire insulation. I soldered the red wires to the switch connectors, filled it with hot glue, surrounded the edges with electric tape to act like an overmold, and threw it all together.
 Prototype/Proof of concept
Wow… What a terrible prototype that was. But it worked. When I flipped the switch off, the microphone lost power and it turned off. When I flipped the switch on, the microphone came back to life. No more disconnecting and reconnecting the USB cable to the microphone.
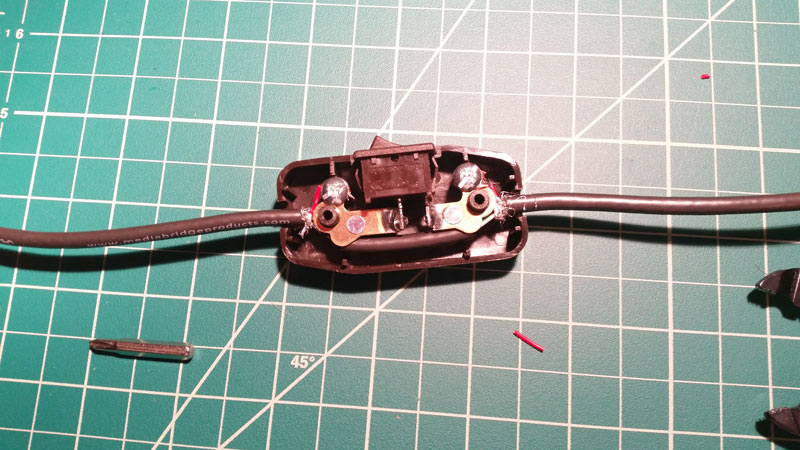
I was not satisfied. I wanted a clean professional look for this. I could do better. So I ordered up a new switch and cable to attempt it again. I stripped away the outer cable shielding being careful not to take too much away. I wanted to keep as much as the cable as possible so that I didn’t need any support outside of the switch casing.
 The assembly process
Instead of soldering the red wire, this time I decided to simply wrap it around the screws and tighten it down. Before closing the switch casing back up, I wrapped the data and ground wires with tinfoil to add any shielding that may had been removed earlier. I closed it back up and confirmed the cable as working.
 All finished up
Here is my final product; A USB cable (A->B) with an in-line power switch near the end. Whenever I feel the need to dim the blue light from the microphone, or turn off its features, it’s only a flip of a switch away. I made this approximately one year ago and it has held up without any problems. A smaller switch may have been a better idea, but I was looking to use pieces that I could easily find. Here is a picture of it set up with my microphone.
final results of the in-line USB power switch