Restoring Vintage with 3D Printing
Kyle Niewiada on September 22, 2013
8 Minute Read | Large project
Updated on October 01, 2021
Now, I understand that some people like to have posts that show progress they’ve made before and after a project. I’m sorry to say that I don’t have that many posts of the “before”. I only thought about documentation half-way through. Without further delay, my (mostly restored?) Marantz 2220b as told by a lurker.
I originally made this thread on AudioKarma, but thought this would also be an appropriate place to write this post.
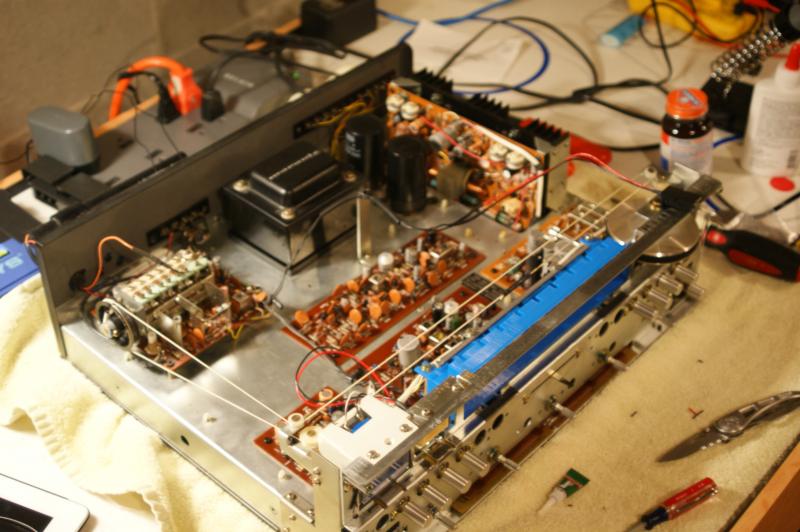
Before I begin, I started this project to restore my own Marantz 2220b. I’ve had the little guy…er…rather not so little, for roughly two years. In that time, I have loved having it as my main (and only) amp (and it happily replaced my Sony amp from the 90s).
My story begins with my amp (what else!?).
Sorry for this poor photo. This was from a few months ago. I forgot to take ‘before pictures’. As you can see in the photo, there are two-ish burnt lamps. Since I took this photo, nearly all of my lamps burned themselves out. That lead me to decide on a project to restore my amp.
 Original Lighting
Those pretty blue (or in this case– greenish) lamps…er..normal lamps were in need of replacing. When I had first purchased this (from a smoker), it ended up being pretty filthy on this inside. But at the time, all of the lamps worked. So I spent my time cleaning it out and running DeoxIT through the pots and switches.
While researching for information about my Marantz amp, I decided I should replace all of the incandescent bulbs and fuses with LEDs. So I made my purchases from ebay (both for the lamps and for the stereo/dial bulbs). I will post information at the bottom if you are interested.
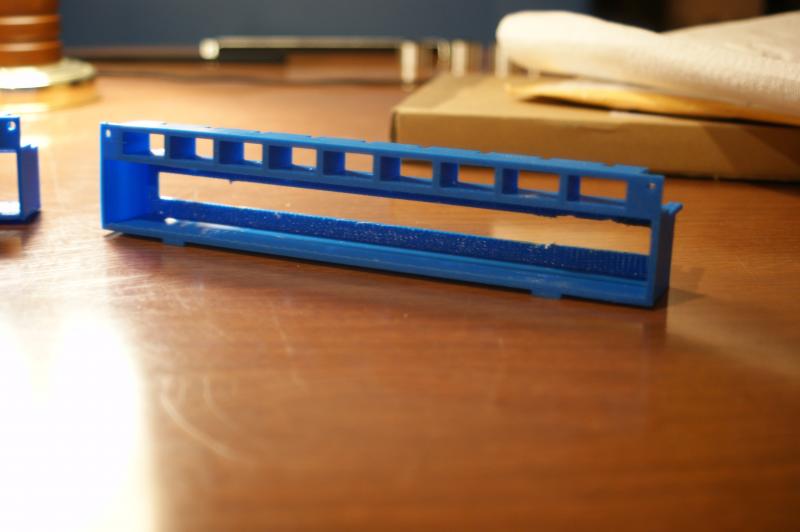
I had one problem. Like other people who own an older Marantz with plastic lamp housings, many of them have melted, become broken/brittle or lost shape. I was no exception. My lamp housing was partially melted and my tabs were broken off. They are hard to find in acceptable condition, and when one is found, it costs an arm and a leg to obtain.
I did however discover that a user here on AK (Kudos to bikemandan!) posted a 3D model of a lamp housing he had created. I was able to use that as a starting point for my restoration.
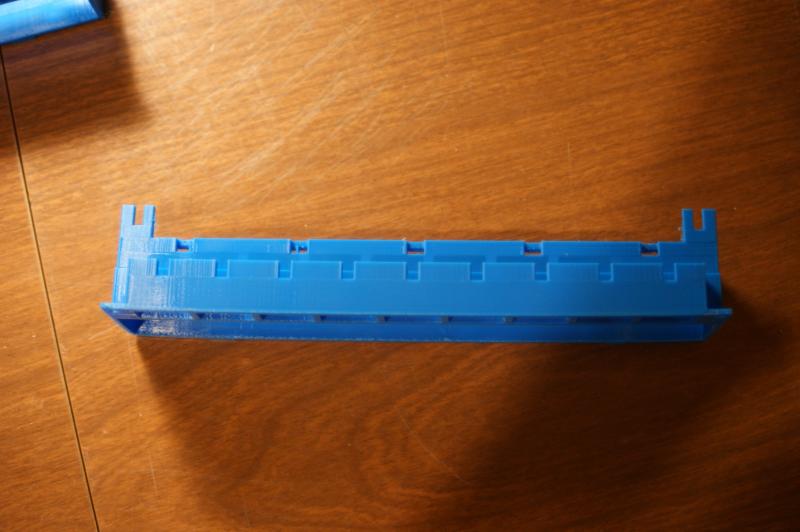
After a bit of research, I concluded that his lamp housing had a very good chance of fitting perfectly with my model (it was about 90% perfect for me). I used his model to help re-create a version more suitable for both my 2220B, and a 3D printer. My result was this.
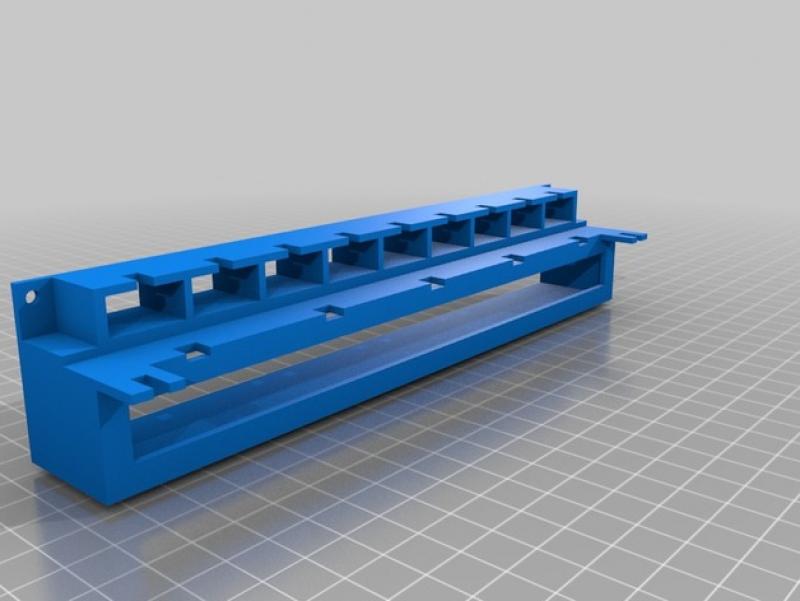 Link to file on Thingiverse
Now I was tasked with trying to find a place to print it. I discovered that 3D printing was expensive! Luckily, I had two friends who both had 3D printers. Unluckily, neither of them had theirs working with no ETA.
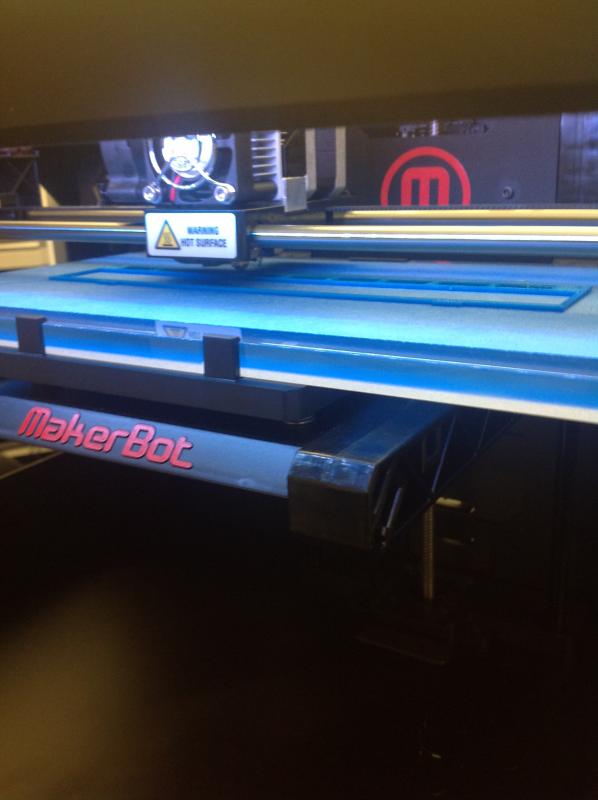
That is when I found out that my local university had just very recently purchased a Makerbot Replicator 2.
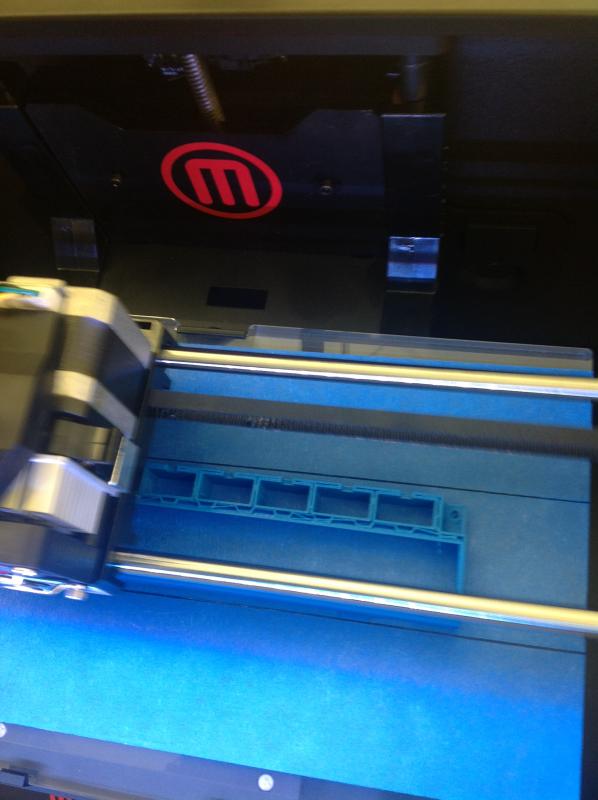
I scheduled up a time to work with the 3D printer. That’s when I discovered that I was the first person to use it with one of my own designs. This is where I ran into a few issues with the 3D printer.
It started out very nicely.
 Makerbot 2 printing Marantz Housing
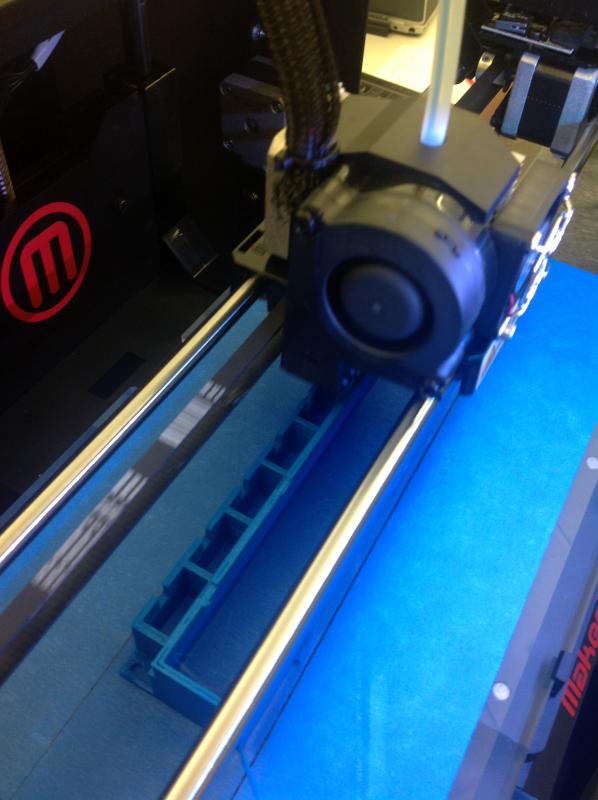
But then, as the printer approached the top of the design, it could not figure out how to print the top layer without supports (I have a personal opinion on what the algorithm should have done, but that’s another story). So near the end of the print, it turned into a stringy disaster.
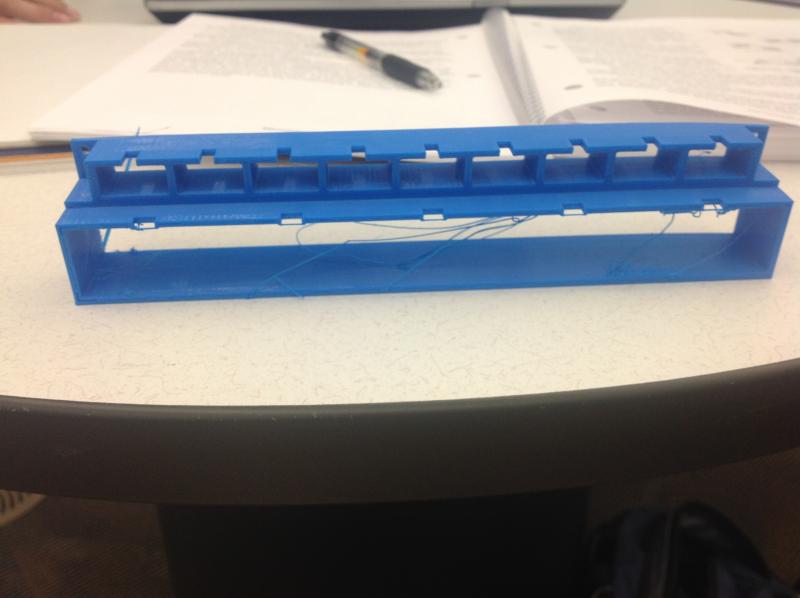 Failed housing design
I had also discovered that during the print job, the temperature of the room had changed by well over 10 degrees. This caused my model to warp in on itself on the build platform. Either way… this model was not going to work.
After that print job, the girl running the printer suggested I could try it again overnight. I quickly agreed, added supports to the model, and awaited the final product.
The next day, I checked on the print job only to find out that it had stopped 10% of the way through. This seemed like a very odd bug, and I decided to print it again. After about another hour of re-calibrating and re-fixing the build platform, the printing started. It was taking a long time to start the print job because none of us had ever printed an object of this size and ‘sorta complexity’ before. We kept missing important steps of the print setup.
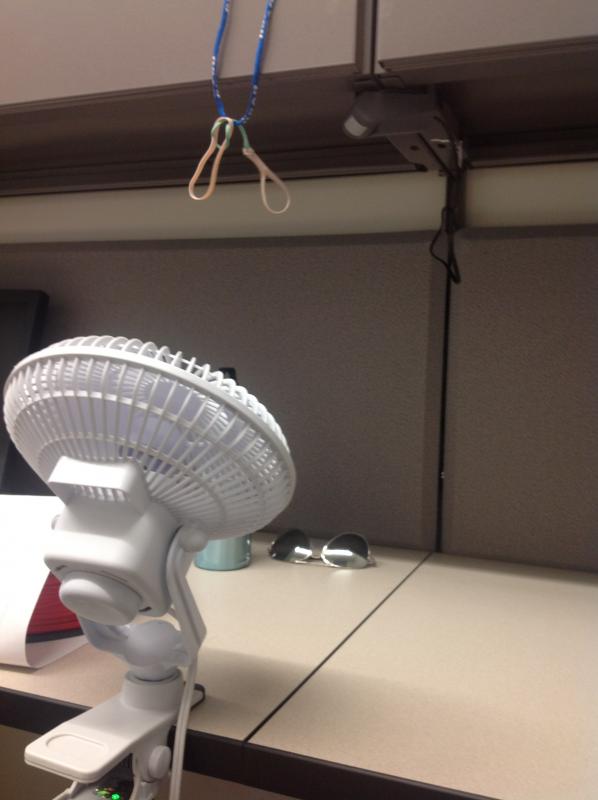
Around an hour into the print job, I noticed that the printer was plugged into a power strip with a motion sensor. It was at that point that I realized the printer must have been shut off the previous night (Causing the print job to stop & cancel) because no one was around to trip the motion sensor. Because I couldn’t stick around for the print job to finish (I had class), I improvised.
This fan blew the rubber bands in front of the sensor causing it to reset its timer every few seconds.
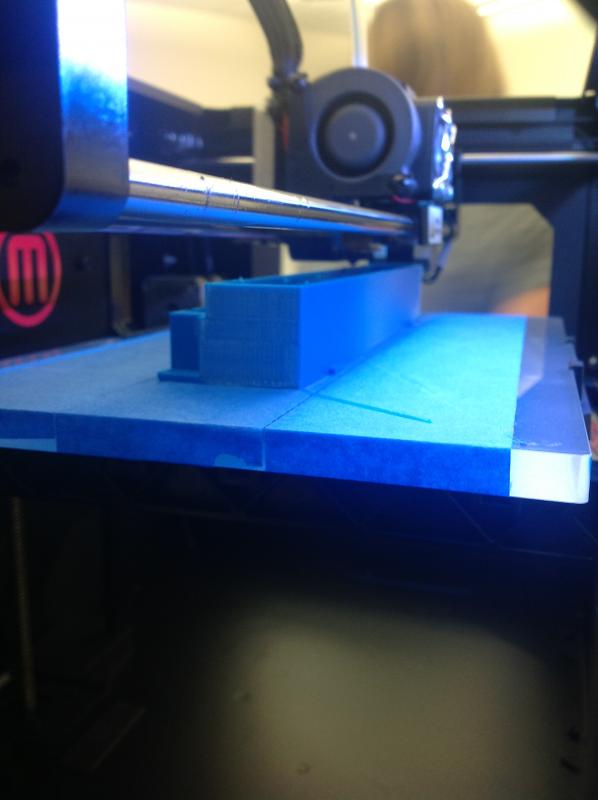
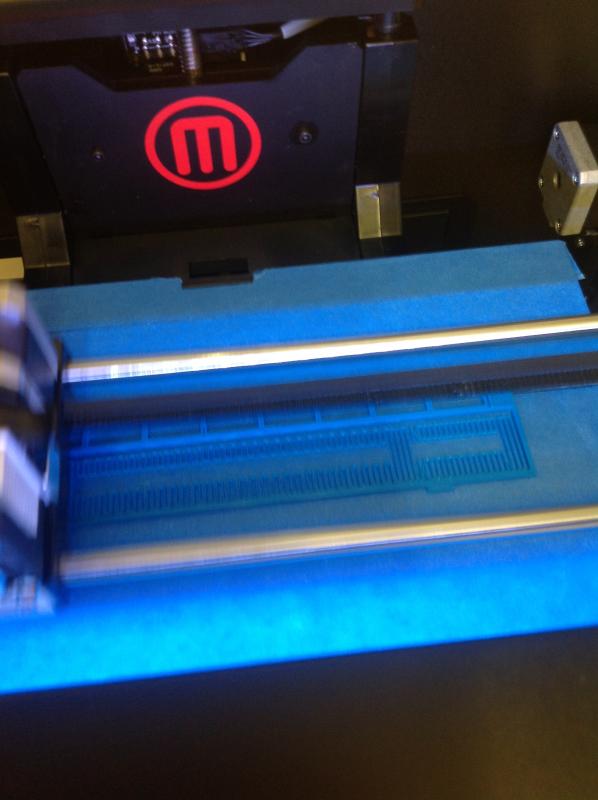
Here is the final photo I took of it printing before leaving. You can see the breakaway supports that are being added at the bottom (or in this case the front of the model).
This quick setup kept the printer from going off for the duration of the 5.5 hour print job.
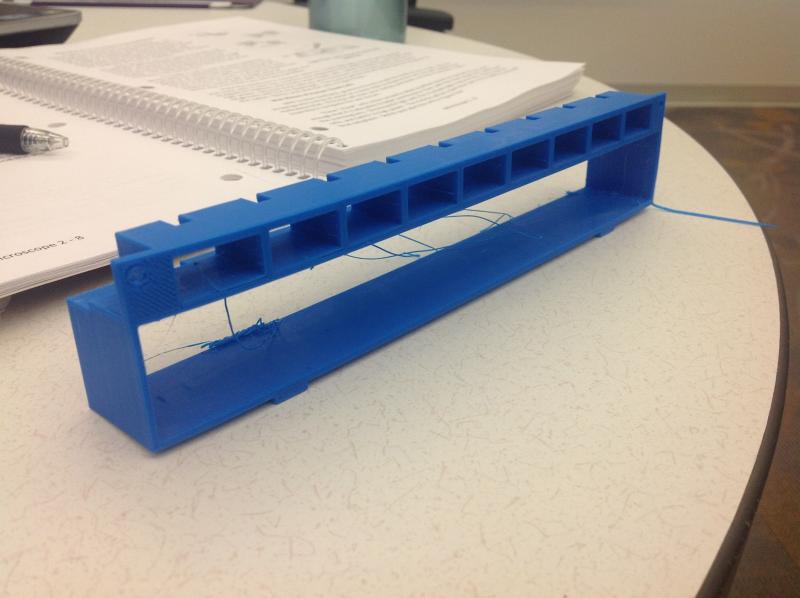
At the end of the day, I picked up my model, broke off its temporary supports, and prepared it for the rebuild of my Marantz 2220B.
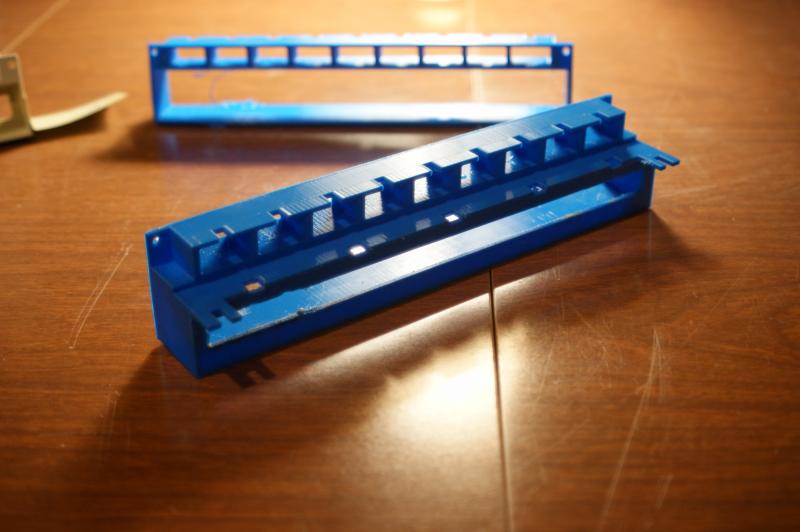
Here are a few photos of the final results. You can see the original lamp housing on the left, the failed (string and warped) print job in the middle, and then the final model on the far right. It’s worth mentioning that the mode on the right had to be slightly modified; hence the rough edges in the back. I had to increase the size of the hole in the back (which has been updated in my thingiverse model) in order to get the fuse lamps to fit through it.
The end cost to me was free (it probably won’t happen again) because they have not figured out a way to charge students at my university on printed objects. But, I was also the first student they’ve ever had use their printer for a project. Every object printed up to this point were small items found built into the device or from the popular sections of thingiverse.
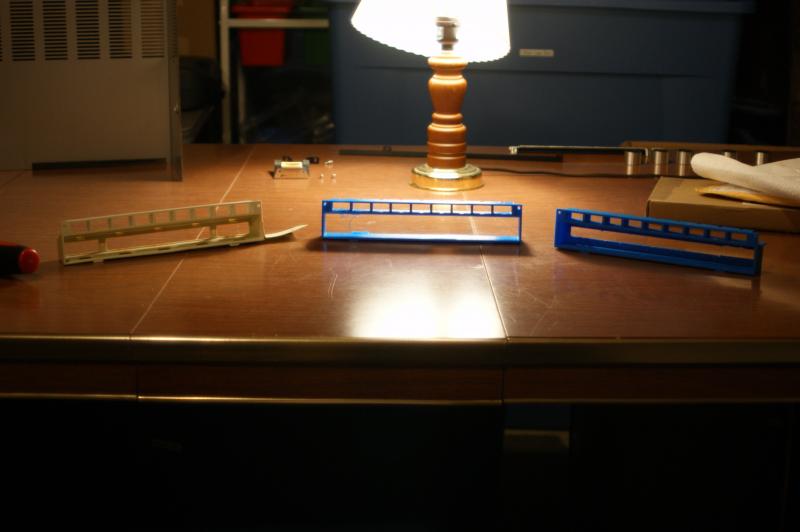 Original, prototype, and final
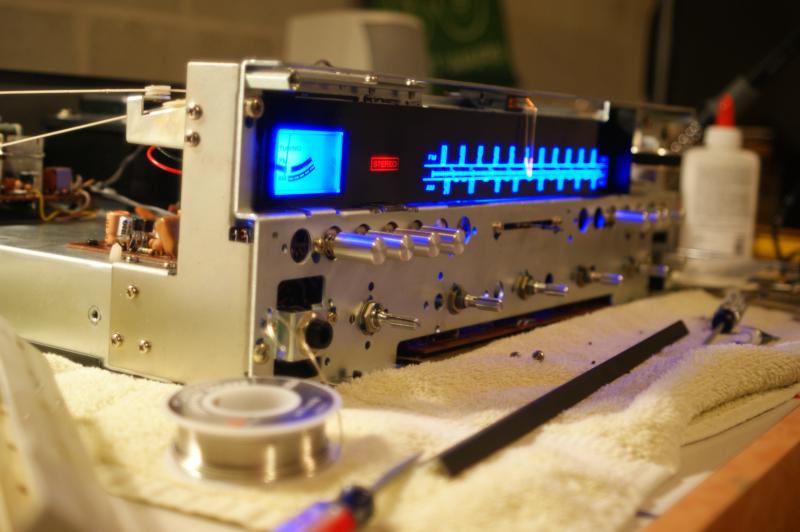
Now I had a perfectly built lamp housing to go in as a replacement for my old one. I placed the model into my Marantz and you can see that it fits without any issues.
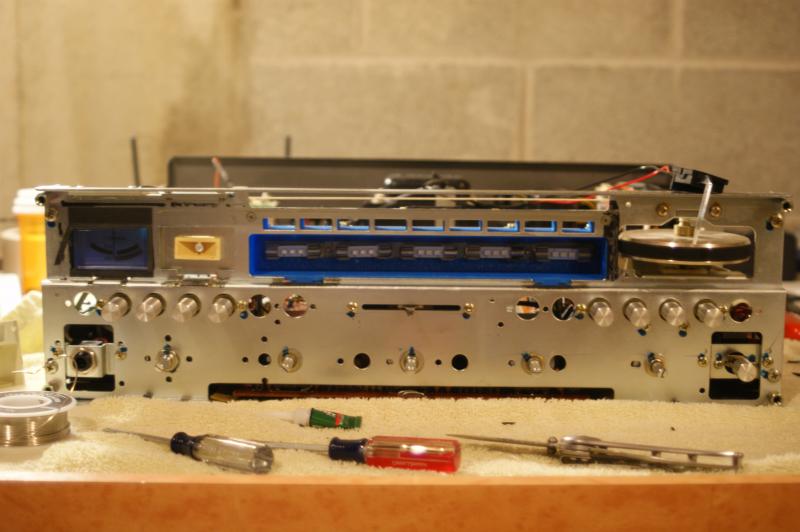 Almost ready for the first test..
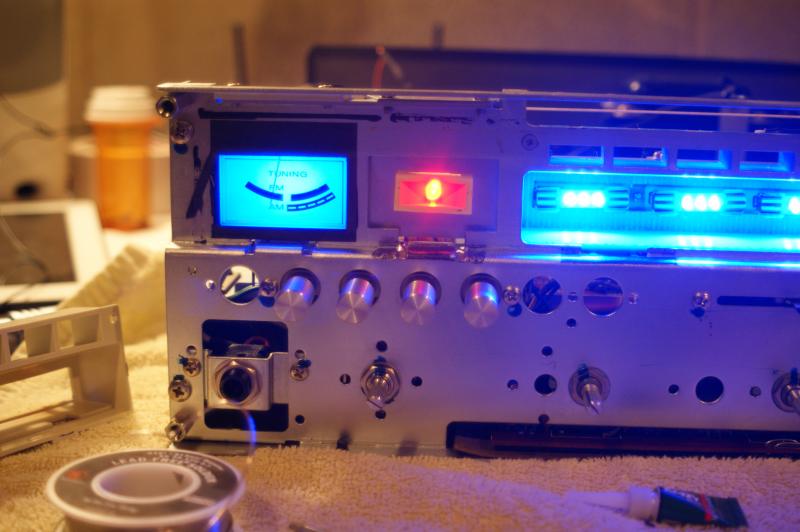
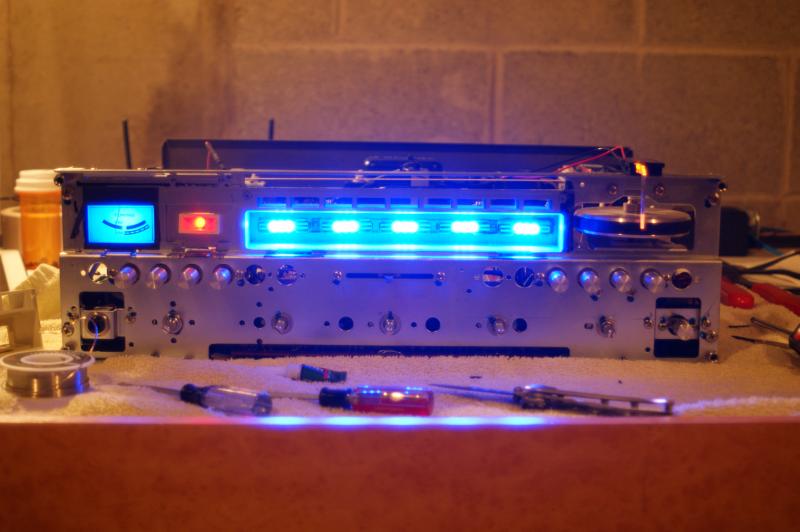 An overview of my Marantz with the bright blue part placed inside.
An overview and comparison of the parts
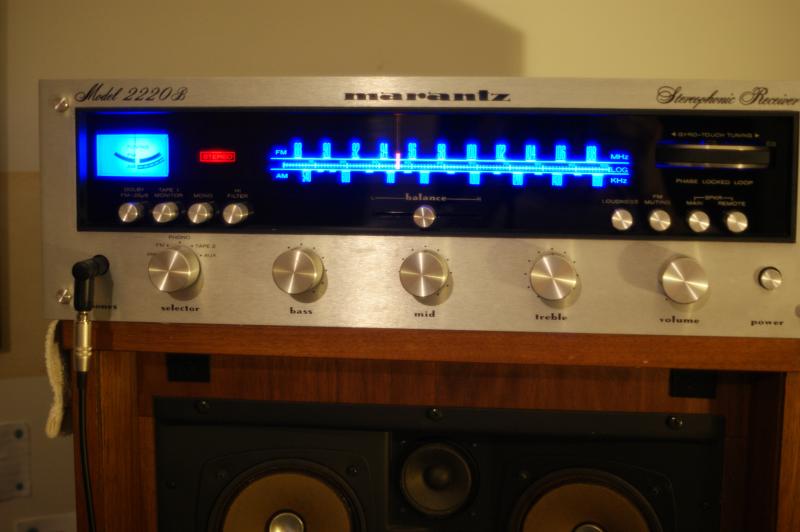
A close up, and then with the faceplate on.
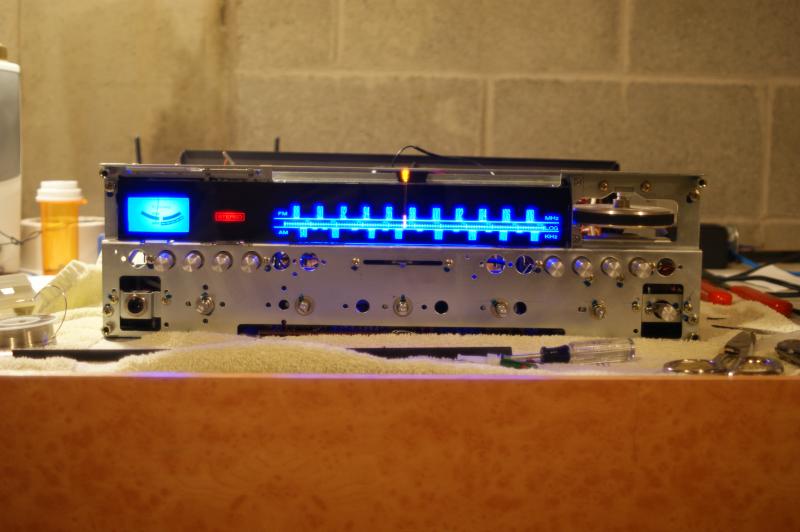 Front glass finally on
Now I’m putting it all back together (with new vellum)
 Faceplate engaged!
Of course, I also re-adjusted my amp’s voltage and amplifier biases (All 4).
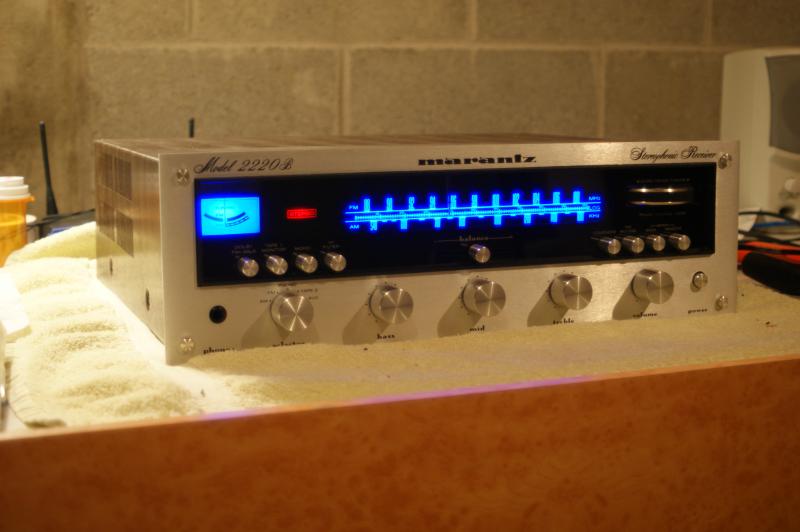
Here are the final results of it all in action. (For those of you wondering about the feet; Yes, I still have them. But I removed them because they hang over my speakers just on the edge causing damage to the wooden speaker cabinets.)
Overall, it is very red and blue. Maybe too blue.. but I think it will grow on me more than the green… maybe.
Edit: It has. I like it.
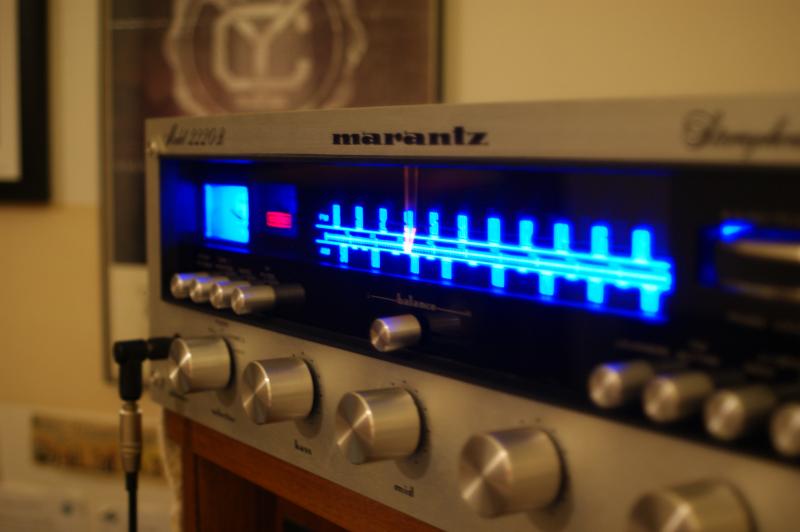 Yellowcard poster hiding in the back…
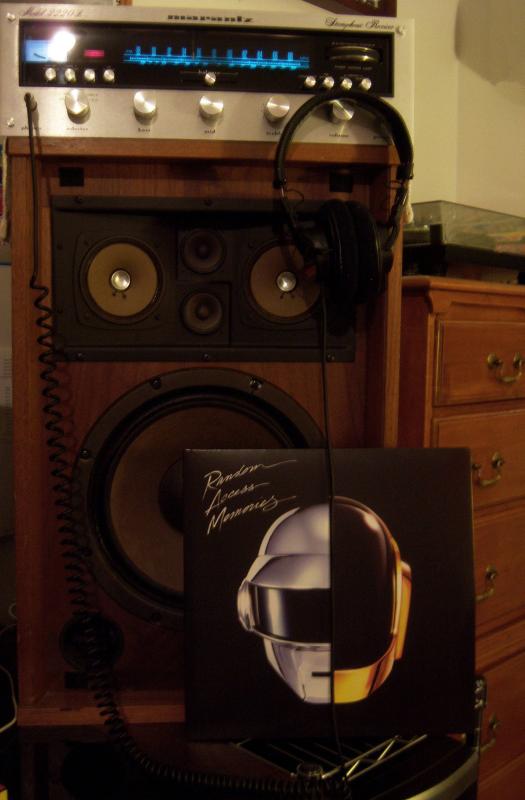
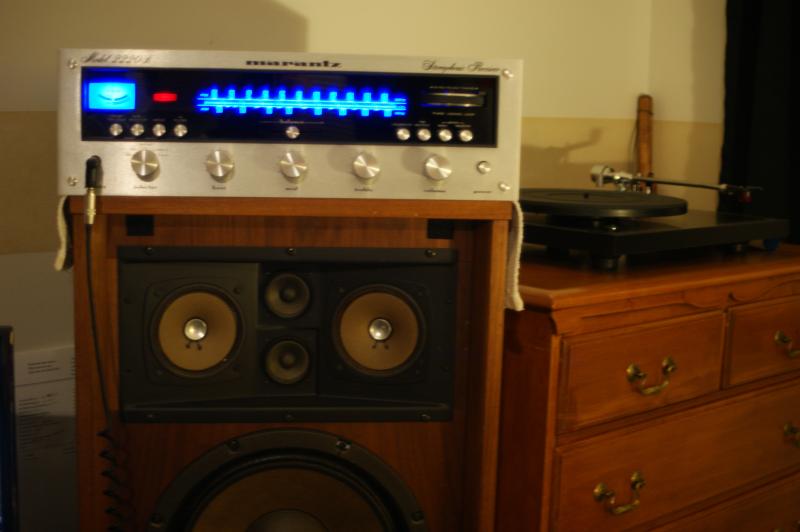 Pairing up with my setup
Nice even lighting, adjusted bias, and a great looking amplifier. I hope you’ve enjoyed this post as much as I have!
If you have any questions about the process or would like you know anything else, feel free to ask!
Afterthoughts:
3D printing has been in the news a lot lately. I get it. It seems to be a pretty big deal. Well…it is! When one makes a 3D model on the computer and prints it for the very first time, holds that object in their hand, they are left with a surreal feeling. This is beginning to blur the lines between what we see as imaginative, and reality. It truly is a fantastic technology that I eagerly await any growth in its field. Here is to a future technology that can help enhance our lives one print job at a time.
–Lots of information and links that somebody might want to know–
Printer Used: Makerbot Replicator 2
Plastic: PLA (Blue)
Time to print (With automatic supports): 5.5 hours on default standard settings.
Marantz Model: 2220B
Turntable: Rega Planar 3 (With 24V motor upgrade.. it needed a new motor at the time, decided to upgrade during replacement)
Speakers: Sansui SP-1700 pair (Only one is shown. Grills are removed. I love the look). They sound amazing paired with the 2220B.
Headphones: Sony MDR-V6 circa early 1990s
Blue LED Fuses were purchased from ebay user investmentaudio.
LED Stereo “bulb” + Amber indicator LED were purchased from ebay user wlyn5455.
Original Lamp Housing Design
My Lamp Housing Re-Design
Keep listening