Building a Vent Booster & Other Cool Ideas for My Bedroom
Kyle Niewiada on October 06, 2026
13 Minute Read | Medium project
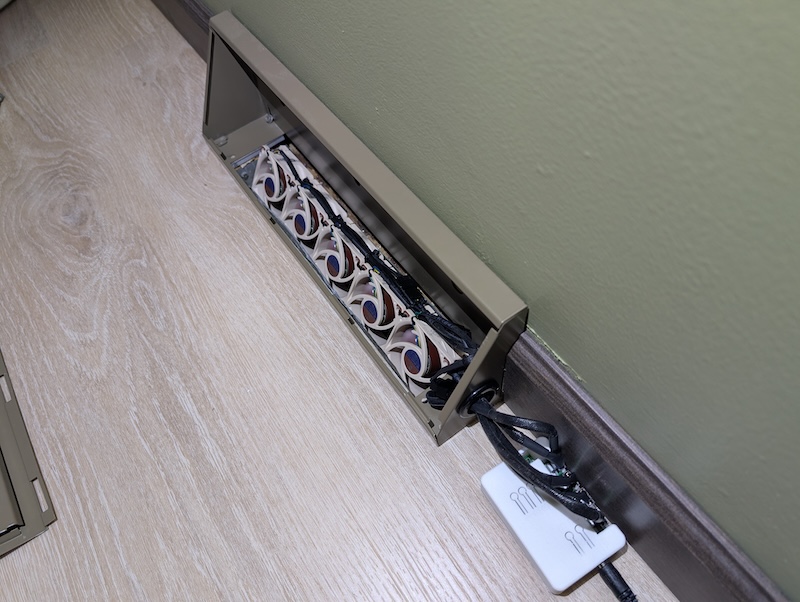
Our bedroom is at the end of an HVAC trunk. It gets uncomfortably warm. Not enough to keep us awake, but warmer than we would prefer. The airflow from the supply register in this room isn’t spectacular. There isn’t a blockage; it’s just a suboptimal design from the 1970s.
From testing, we could see the thermostat in our kitchen had no problem reaching our target temperature. But our bedroom always lagged behind a couple of degrees from our setpoint. We were seeking a more even temperature distribution throughout the house.
Table of Contents
What We Tried First
Over the last 6 years, we’ve made a few changes to help influence our home’s temperature.
- 2020
- Locate and seal gaps using a thermal camera.
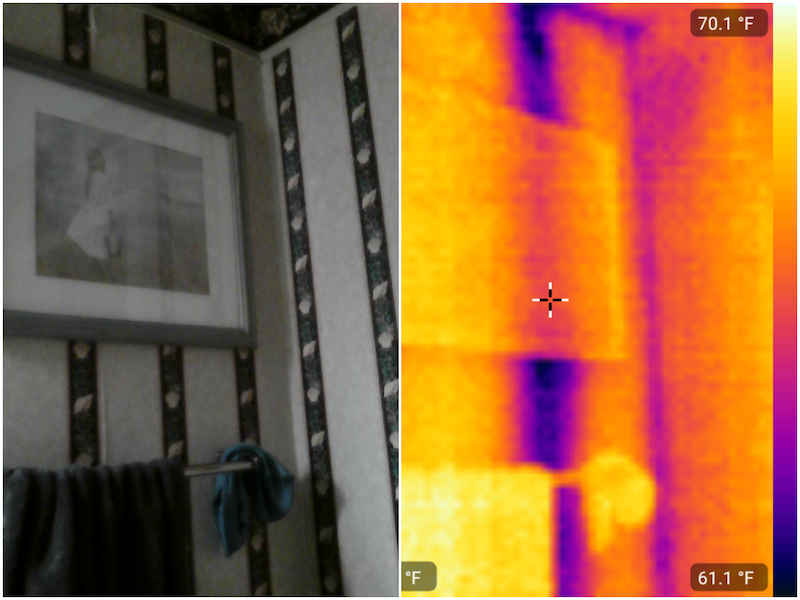 Thermal camera revealing an uninsulated stud bay in our bathroom wall
- 2021
- Replace the roof and add better ventilation through additional soffit + ridge vents.
- Add new attic insulation.
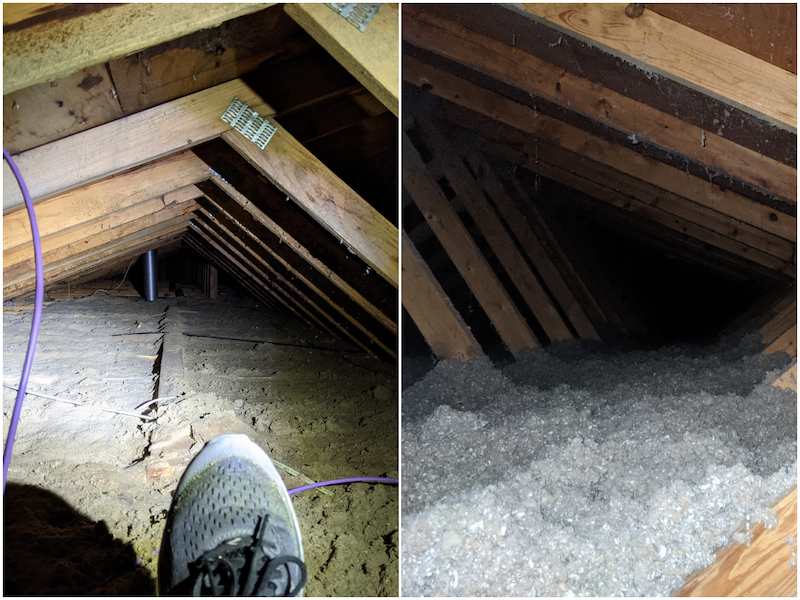 Before and after new insulation was installed in the attic
- 2023
- Add a window air conditioner. This worked well until wildfire smoke seeped in and ruined our indoor air quality. We don’t install it anymore because of that. 🚭
- 2025
- Adjust basement supply registers/dampers to force air to the main floor. This is like creating our own manual zoning. This helped for sure! But be careful not to burn out the HVAC blower motor.
What We Tried This Year
For the summer of 2026, I wanted to try a few more things.
Lower the Temperature
First, we lowered the thermostat by 1 degree at night. The end. /s
Obviously, this helped it feel cooler because it was cooler. But I wasn’t satisfied with those inefficiencies since lowering the whole house by ~1 degree at night required an additional ~2.46 kWh of energy from our air conditioner above our nightly baseline.
That’s ~$0.55 spent each night at our current pricing, or ~$50 throughout the summer months. All to cool down a single room while unnecessarily cooling the rest of the house.
I could do better.
Ceiling Fan
Second, run our ceiling fan on a schedule to make it feel cooler. Running this for 8 hours consumes ~0.32 kWh. That’s ~$0.07 a night or $6.50 for the summer months. That’s great!
Right off the bat 🦇, ceiling fans won’t make the temperature in the bedroom cooler. Instead, they create a wind chill effect and help sweat evaporate throughout the night. So if it feels colder, our goal is basically met?
An added bonus is that colder air is supposed to be circulated around instead of getting trapped on the floor. There aren’t many downsides to this unless you hate the feeling of air on your face at night.
Vent Booster
Third, install a single vent booster to help pull the cooler air into a specific bedroom.
⚠️ This idea has so many caveats. Here are just a few:
- Are there existing problems with the ducts that would prevent this from working?
- Can the return vent handle the increased pressure, or will it create a back-pressure situation in the room?
- Will this prevent other rooms on the same main trunk from getting proper airflow?
- Will the fans block air if they’re too slow?
And really, I should be mapping out the air pressure and flow from each vent to know how to properly balance it. But I also have an older HVAC blower that only runs at one speed. It wouldn’t be easy to make adjustments the correct way without an ECM motor.
With all of those considerations aside, I wanted to try the vent booster.
My catch is that I have a baseboard diffuser supply register. My air comes out of a rectangle on the floor near the baseboard, then a supply register angles and diffuses it out into the room.
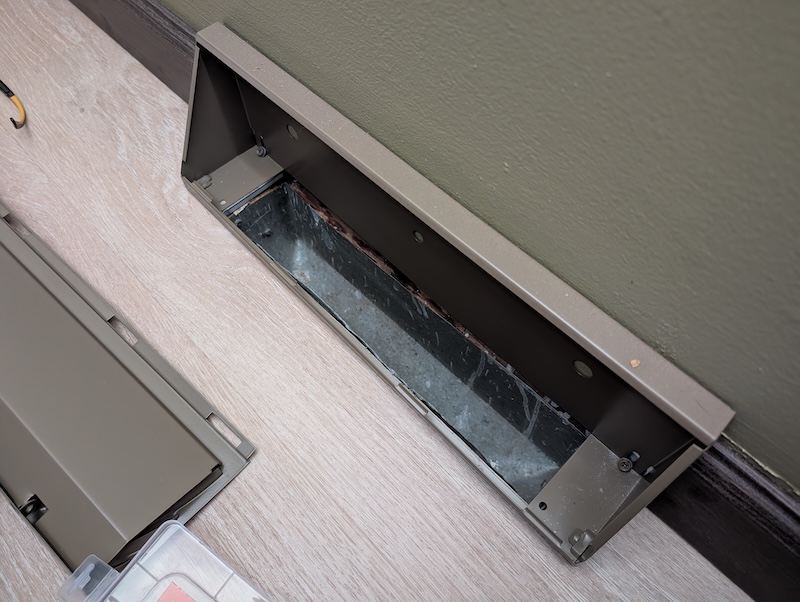 Empty baseboard register
I couldn’t find any commercial duct booster vents that fit this supply style.
There are some DIY kits that allow you to put standard 4x10” booster fans into a 3D-printed adapter housing. But those were pretty expensive ($70-$100+), and they still didn’t include the booster fans (💸).
An in-line booster fan would be great in this situation since they can reach a pretty substantial flow. However, there aren’t any suitable locations to install one since the giant trunk line is only 8 ft. away from the final branch supply in our bedroom.
Instead, I decided to try my hand at assembling my own vent booster fan.
My ESPHome Controlled Vent Booster Fan
Here are the components of my vent booster fan.
Fan Controller
- ESP32-S2 WiFi Fan Controller: github.com/zeroflow/wifi-fancontroller
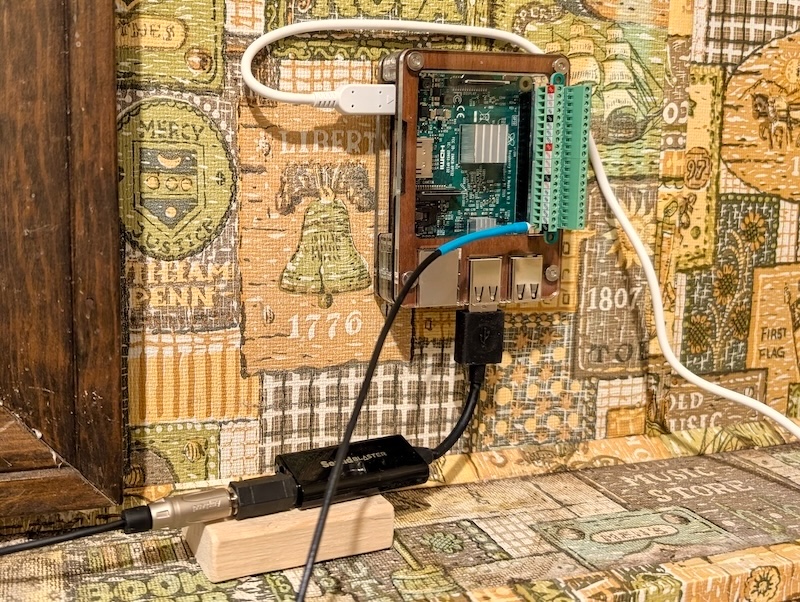
As always, I wanted something that could connect to my Home Assistant setup and remain local to my network. I chose to use an existing fan controller project running on ESPHome.
This fan controller is mostly meant for regulating temperature in enclosures such as server racks, media consoles, or 3D printers. The fan controller is totally an overkill for what I’m doing. But at that price point, the time saved on the complete package was worth it.
Fans
- 5 of
Noctua NF-A6x25(PWM, 4-Pin, 60mm)
The first reason I chose these 60 mm fans is that they fit in my duct. My duct opening is ~300 mm x ~56 mm. The 60 mm fans are about the closest I can get to optimizing my space.
5 of these strapped together with zip ties are right around the size I need.
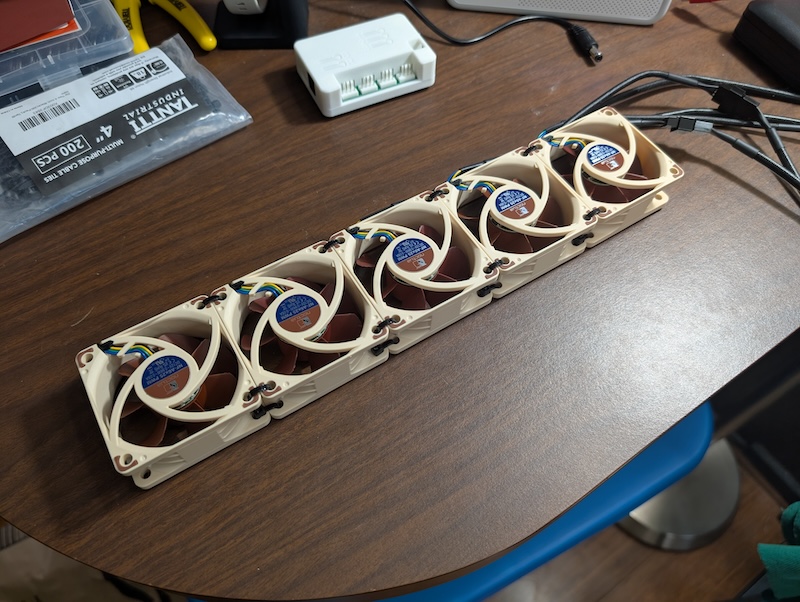 Noctua fans assembled
Next, I selected these fans because they have a decent airflow at 17 CFM. With all 5, that’s roughly 85 CFM in the best possible scenario. But given that I’m fighting duct pressure and louvers in the vent, it is probably half that, around 40 CFM.
Importantly, they have a higher static pressure of 2.18 mm H₂O compared to ~1.0 mm H₂O that most other 60 mm computer fans produce (obviously ignoring server fans which can top out over 10 mm H₂O).
Each fan draws 1.44 watts at its maximum speed. The combined array draws around 7.2 watts or 0.0072 kWh. Not too bad.
Integrating
If you have a keen eye in that reference photo above, you’ll notice that the fan controller has 4 ports and I have 5 fans. 4 ≠ 5 (“proof in the margins”).
Since all of my fans are supposed to roughly run at the same speed, I ran a standard PC fan splitter for the 1st and 5th fans.
It’s advised to run the adjacent fans at a different RPM to avoid harmonic resonance caused by overlapping acoustic frequencies. I ignored that wisdom and ran all of mine at full speed anyway since they’re tucked away under my bed.
If I decide that the harmonic balance is a problem, I can still run every other fan at a slightly different speed (since 1 and 5 are paired together). The only drawback I could come up with is that I’m giving up stall protection for one of my fans.
I flashed ESPHome onto the board using one of the factory configurations in the zeroflow/wifi-fancontroller repo. Then I connected it in Home Assistant to view the sensor data and make modifications.
Assembly
Last, I needed to assemble everything together. As I mentioned before, I have a baseboard register that I was trying to stuff this into. My idea was to pack the fans into the duct, drill a hole into the side of the baseboard register, add a grommet, and lead the wires to the controller sitting on the outside. That would make the controller accessible if I ever need to fix something.
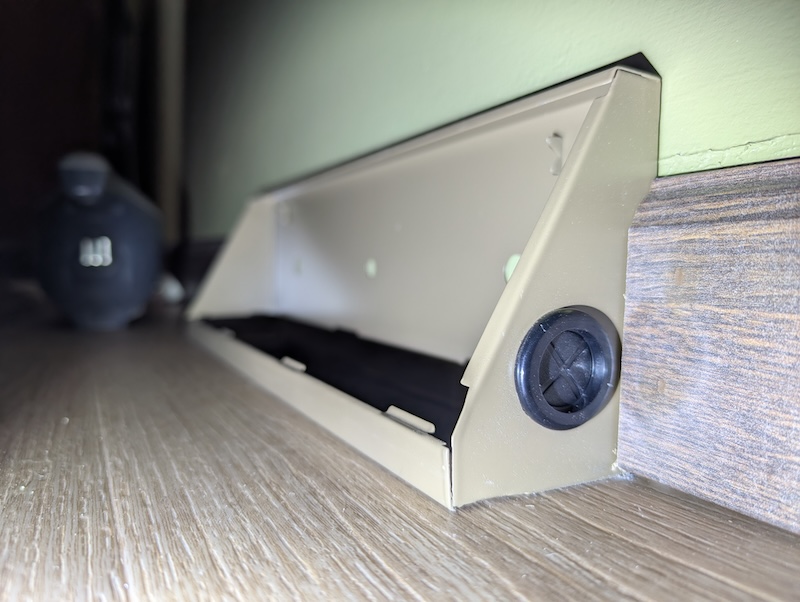 Baseboard register with wiring grommet installed
Since my fan array was slightly deeper than my vent opening, I tried placing them on top of the duct opening. Looks good; didn’t work.
I didn’t really like that idea because placing the fans above the vent opening meant that the top edges along the fans were being placed over a solid lip (and not doing anything). That would affect the airflow design, and I don’t have a GPU that could possibly run these airflow simulations.
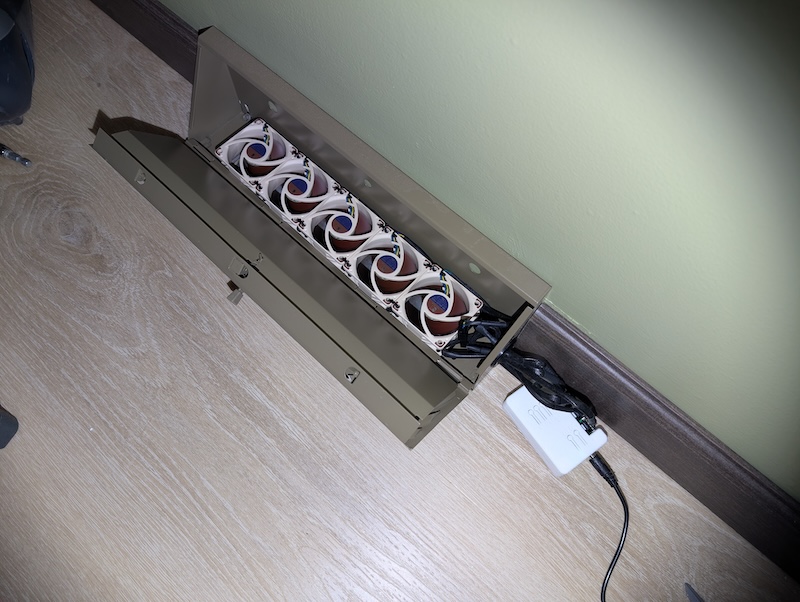 Lots of air leakage on the sides when fitted like this, which reduces static pressure
Also, when I tried to close the vent, the fans were slightly too tall for the vent casing and caused the edges to bulge out. I didn’t like that.
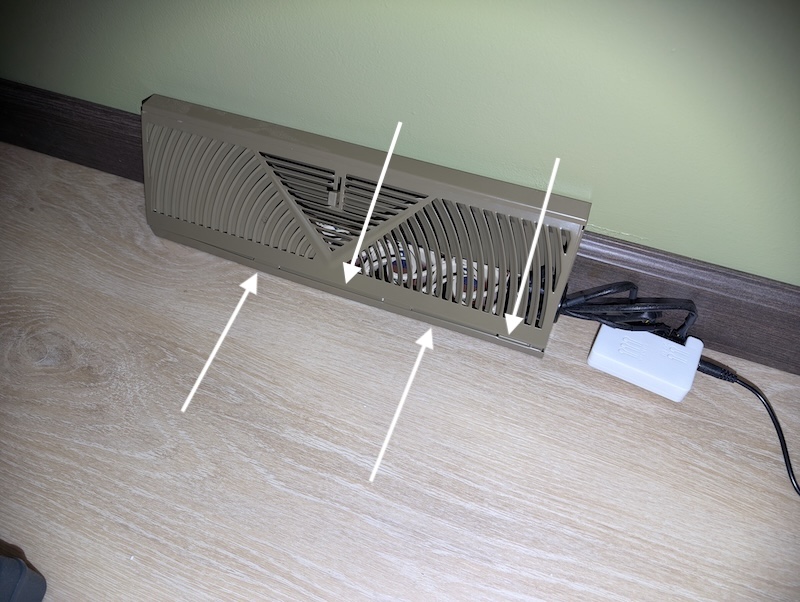 The baseboard register doesn’t reassemble completely with the fans positioned like this
My next idea was to shove the fans into the vent duct. Since the fans were taller than the duct opening, they would have to go in on an angle. They would still be moving air upward, but diagonally ♝. This would be slightly more turbulent, but it seemed like a better option than what I had before. I decided to test it.
Register fans fit perfectly when inserted into ductwork at an angle
They fit inside the duct; that’s a good sign!
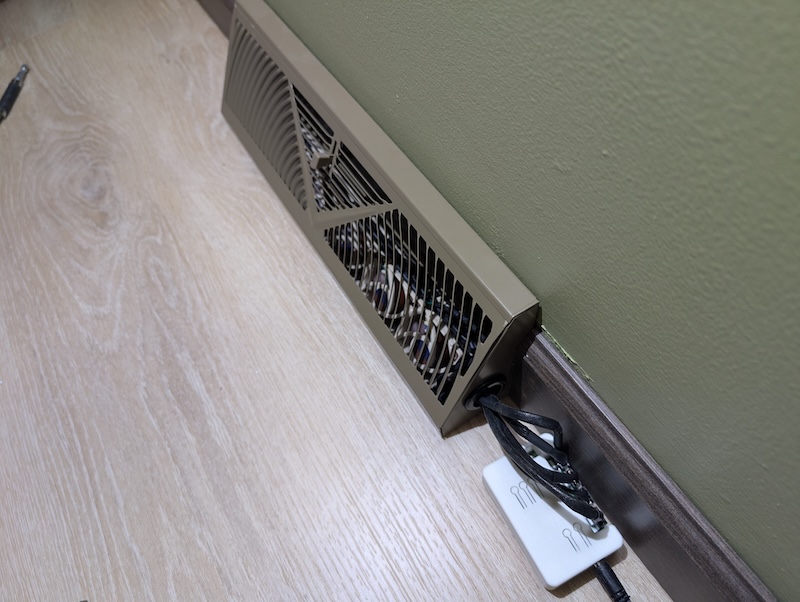 Baseboard register closed with fan array inserted perfectly
And the register closes too!
I turned it on and set the fan array speed to maximum. I grabbed a tissue and held it in front of the vent.
And it moved! … barely.
I set the fans to run at their maximum speed 24/7. My hope was that if there was any data to be gathered, this would make the changes more apparent. Whether it improved temperature, humidity, or CO₂ levels at night. I wanted to see any change.
Results
Ceiling Fan
The ceiling fan was a success. My wife said “it feels cooler” when it was on and often made me shut it off. So that worked. 🏆
Here’s a super relevant Technology Connections video if you want to go down a short rabbit hole about ceiling fans:
Vent Booster Fan
After running my vent booster fan for the summer of 2026, the results are in…
I found no statistically significant improvement between the summer of 2025 and 2026. 🫠
Let’s break it down with some graphs.
Graph 1
Here is my first graph. It shows the average temperatures in the summer recorded by the kitchen thermostat and bedroom temperature sensor year-over-year. 📉
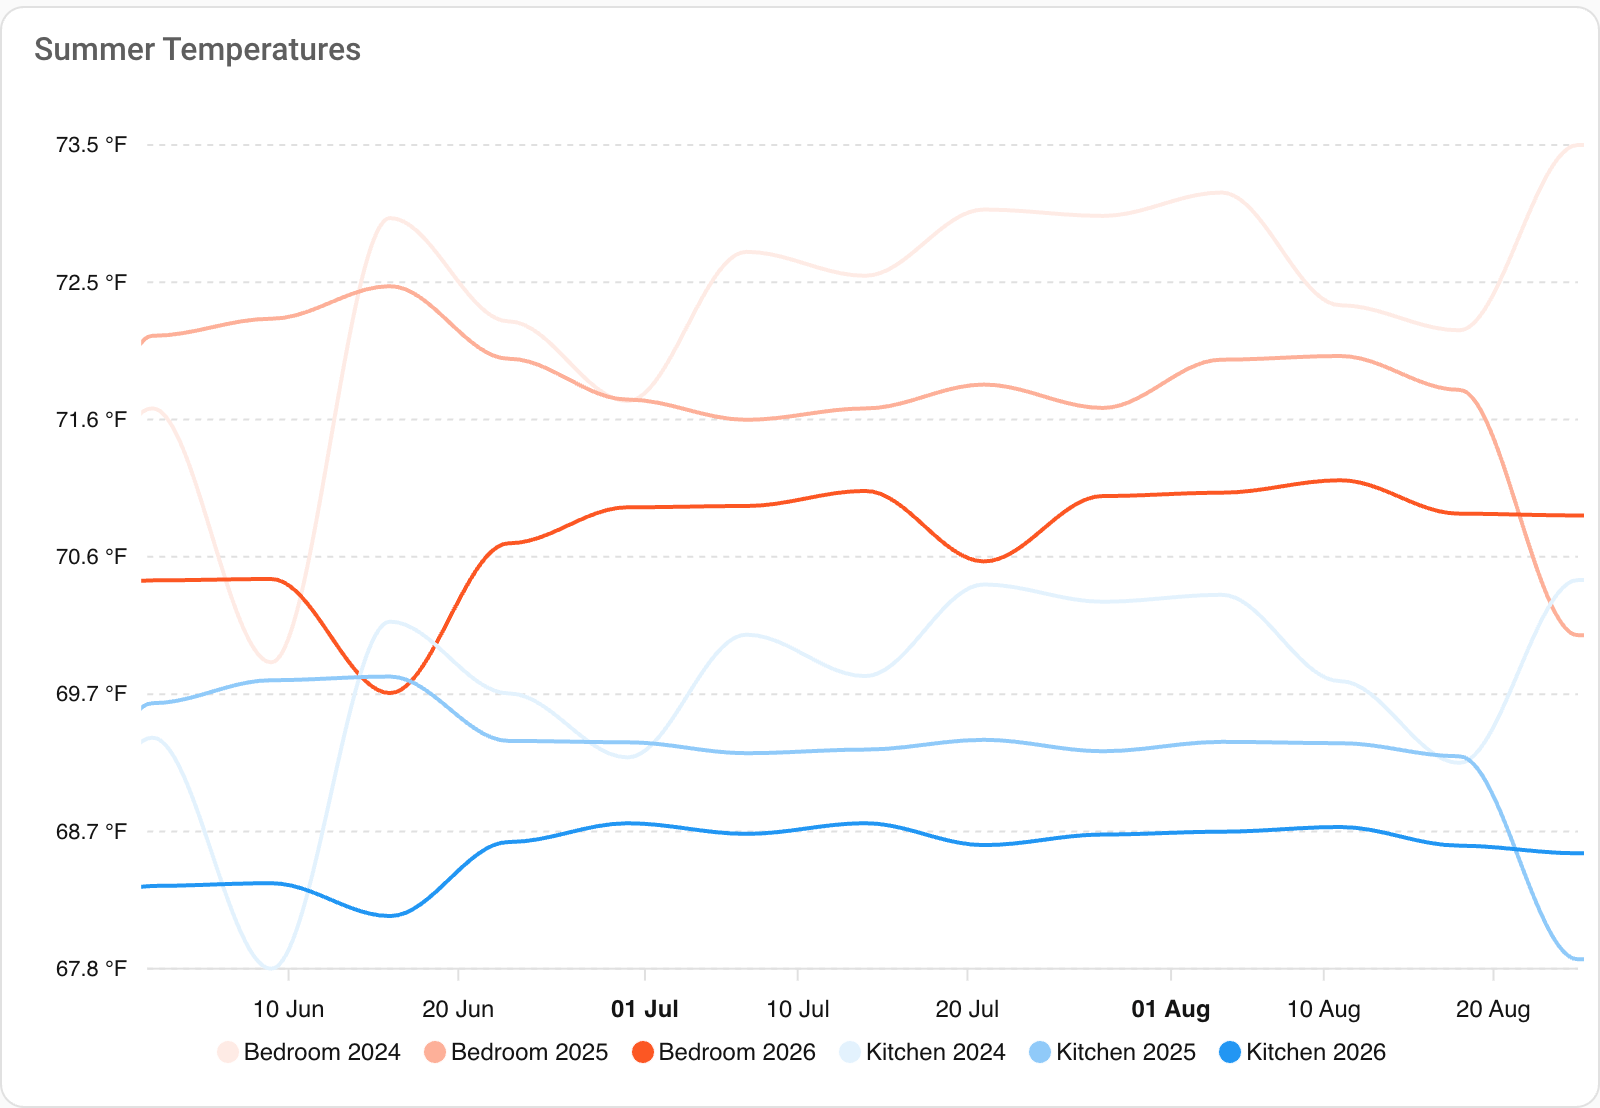 Average temperatures in the summer recorded by the kitchen and bedroom from 2024-2026
- 2024: This was hot for us (and earlier years were worse).
- 2025: I adjusted basement supply registers/dampers to force air to the main floor. This showed a statistically significant improvement and really helped!
- 2026: We ran the ceiling fan more frequently, added a vent booster to the bedroom, and… oh… we lowered the thermostat 1 degree. 😶🌫️
Suddenly that graph above isn’t so useful because in 2026 I introduced an uncontrolled variable from lowering the thermostat temperature by 1 degree. So it looks like it was a success, but in reality it’s lower because the thermostat setpoint was lower. Oops.
Instead, I attempted to handle this by measuring the delta between the kitchen thermostat and bedroom temperatures.
Graph 2
Here I have a graph showing the year-over-year summer nighttime temperature delta between my kitchen thermostat and the temperature of the bedroom. The idea is to show how much the bedroom lagged behind the kitchen thermostat.
There is a slight caveat that because I’m adjusting the temperature, I’m also introducing other variables such as heat retention of materials and temperature rate changes (due to it running longer in the evening). But my hope is that they are just noise in my charts that get filtered out with longer observation periods.
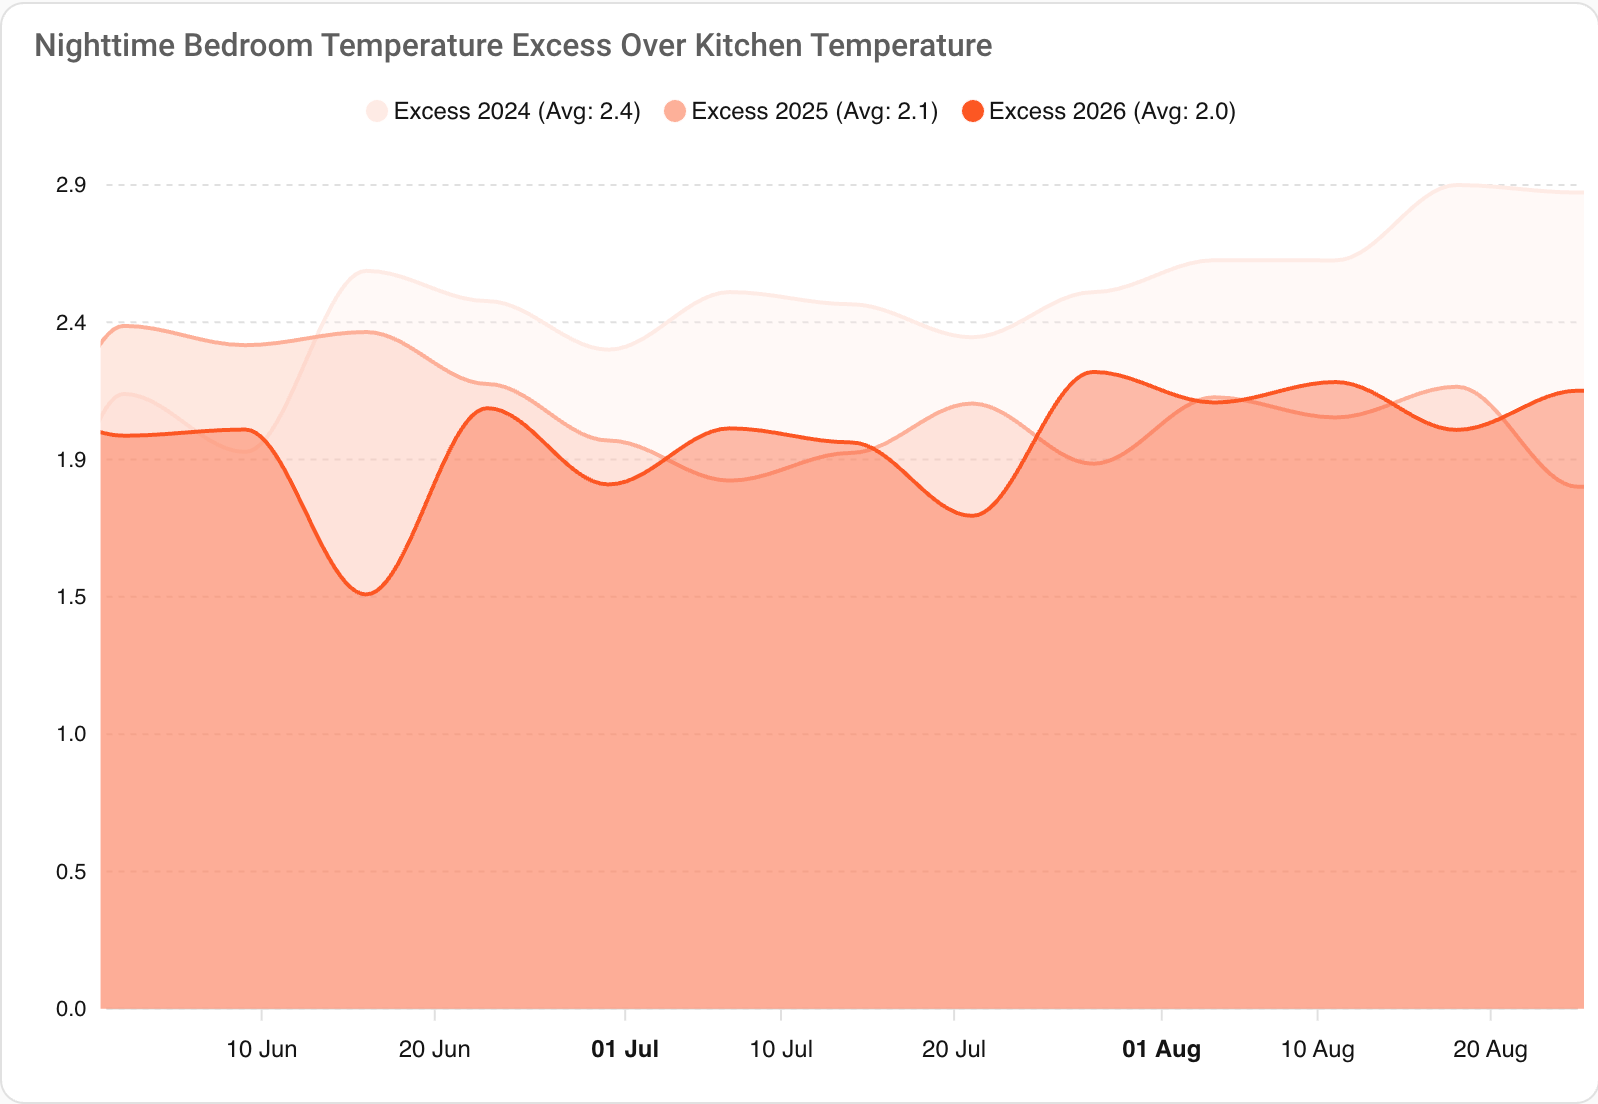 Year-over-year summer nighttime temperature delta: bedroom vs. kitchen (2024–2026)
Without a surprise, 2024 had the largest temperature delta between the kitchen thermostat and my bedroom. 2025 had the expected improvements. But 2026 doesn’t really show the gap that I was anticipating.
The big thing that I thought would have changed the graph in 2026 was the vent booster fans. But it didn’t.
Is that a failure? Technically, yes. But there’s nothing wrong with that. I either implemented something incorrectly, or my premise is wrong.
Why Didn’t This Work?
I came up with a handful of reasons why I don’t think the vent booster worked this year.
First: My biggest guess is that the fans have weak airflow. Trying to move air through all of these bends and louvres is difficult, and I don’t think my setup did a very good job.
Second: The fans were installed at an angle. This creates more turbulence and reduces the velocity of the air.
Third: Leaky edges. I should have used some HVAC tape to seal up the edges around the ductwork to both smooth the airflow and to keep it from going between the flooring layers. Even the edges around the fans inside the duct could be considered leaky.
Fourth: It’s a bad idea.
What Could Make This Better?
If I want to test this again next year and completely rule out whether or not the booster fan idea is junk, these are the areas that I think I could improve.
- Increase airflow
- Less turbulence
- Better sealing
What’s Next?
I could take one of the community-made booster fan covers (for baseboard registers) and slap on 3 larger fans. Then I could plug those into my fan controller.
Something like this would work nicely as a start.
I’d need to make modifications to the opening to properly fit common-sized computer fans, put my grommet hole in the side, and make some other tweaks.
Oh look, did I already make a new prototype? I wonder what will happen in 2027.. 👀
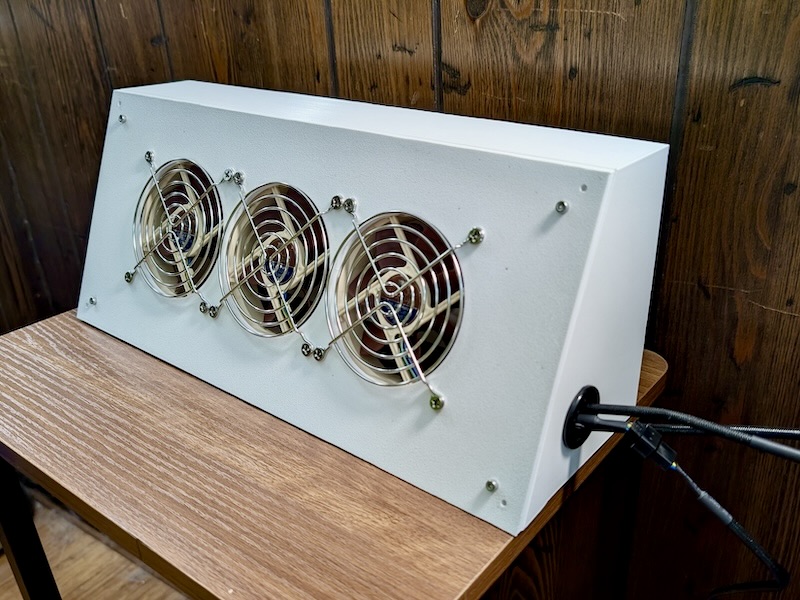 3D-printed baseboard register vent prototype for future testing 👀
Is that the most effective $ spend? Probably not. Am I going to learn something through this continued experiment? That’s the goal!
Conclusion
I wanted to make my bedroom feel cooler this summer along with fixing some temperature imbalance between this room and the house.
I’d say I definitely found that the ceiling fan helped things feel cooler. But I think there is still more that I want to do to remediate the temperature imbalance and save a bit of money. I want to know if my ideas work and what I can continue to learn from this next year. 🎓