Deploying ESPHome Smart Plugs to Replace Z-Wave
Kyle Niewiada on July 19, 2020
9 Minute Read | Medium project
About a year ago I went on a crusade to transition my smart home devices to something that could be controlled locally. The goal was to remove any need for external cloud services. One of the ways that I did this was through buying Z-Wave devices. For the uninitiated, the Z-Wave protocol operates on a different frequency than the 2.4 GHz spectrum. This leads to less interference from poorly shielded microwaves, slower Wi-Fi devices, and avoids spectrum congestion from devices like Hue bulbs (which operate closely to some 2.4 GHz Wi-Fi channels).
The Wrong Decision
I am willing to admit that I made the wrong decision last year when I decided to buy into Z-Wave. On paper, it was a dream to operate on an uncongested wireless spectrum. The reality is that some Z-Wave devices ship with bugs. It’s not always possible to apply an update unless you have a responsible manufacturer and the ability to apply the patch. This means you could be permanently reliant on downstream patches to get the full functionality out of the device. The broadcast range for Z-Wave devices is not great for our small apartment. I frequently notice state changes will get lost if the Z-Wave device is too far away from the nearest repeater.
Fuel to the Fire
To add on to my frustration, the 7x Zooz Zen15 smart plugs that I purchased (across four different batches) required three separate RMA’s within one year. Each of the RMA’s was due to faulty power reading spikes which would cause the overcharge protection to trigger and shut off the plug.
Through some extensive testing I found this to be a fault within the plug each time. I was able to prove this by placing a Kill A Watt electricity usage monitor between the wall and the Zen15 plug. The Kill A Watt was able to contradict any readings broadcast by the Zen15. Except this kept happening with brand-new replacements after only a few months.
There are probably a lot of contributing factors to the failures of the plugs I’m not seeing. Maybe they are more sensitive to electrical fluctuations than other devices in our house. The only thing that I know is I have given up on them.
After repeated failures of the Zen15 plugs and buggy firmware from Z-Wave devices I was ready to distance* myself as much as possible from Z-Wave.
*Pun intended. Except Z-Wave wouldn’t get the joke since the signal would never reach that far. 🔥
Thinking Back to ESPHome
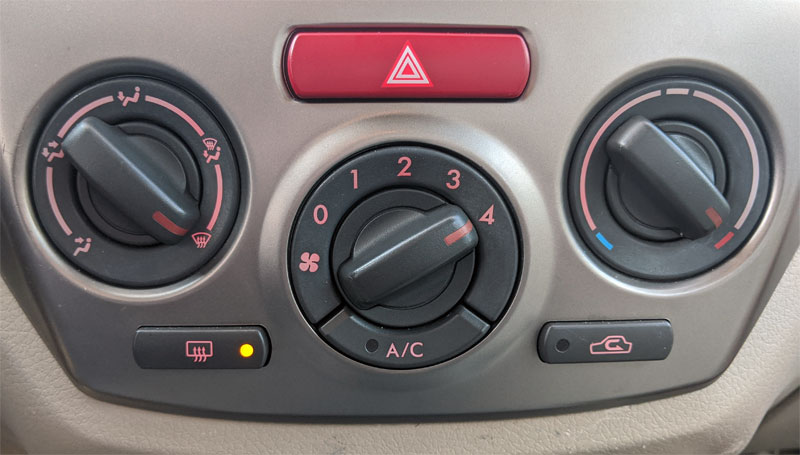
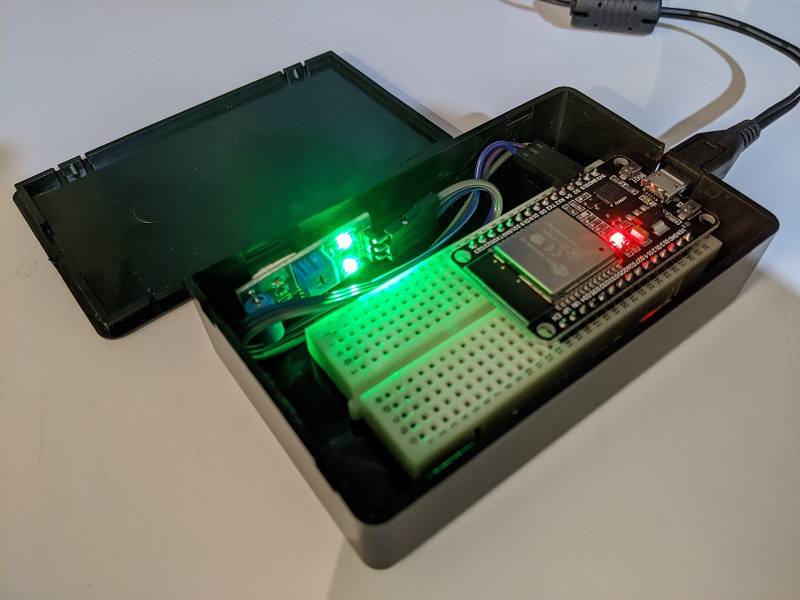
Around this time last year, I modified a noise machine with a NodeMCU board to control the power and state reporting of the box. The board I installed inside the noise machine was flashed with ESPHome– a wonderful custom firmware that can be applied to ESP8266 and ESP32 devices. My experience with managing and updating ESPHome devices has been so smooth that it influenced my final decision on what to replace my Z-Wave plugs with.
On my quest for new smart plugs I was looking for the plug to:
- Handle 15 A
- Maintain a stable connection
- Fit a small profile
- Update easily
- Obfuscate or resolve states before emitting to simplify upstream controls
After a bit of hunting around the /r/HomeAssistant subreddit, I ended up picking the Sonoff S31 smart plugs with ESPHome.
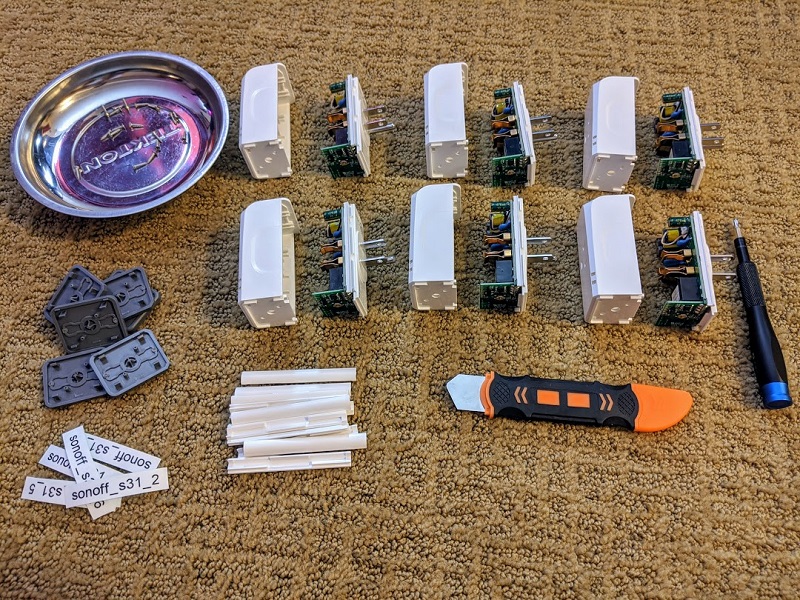
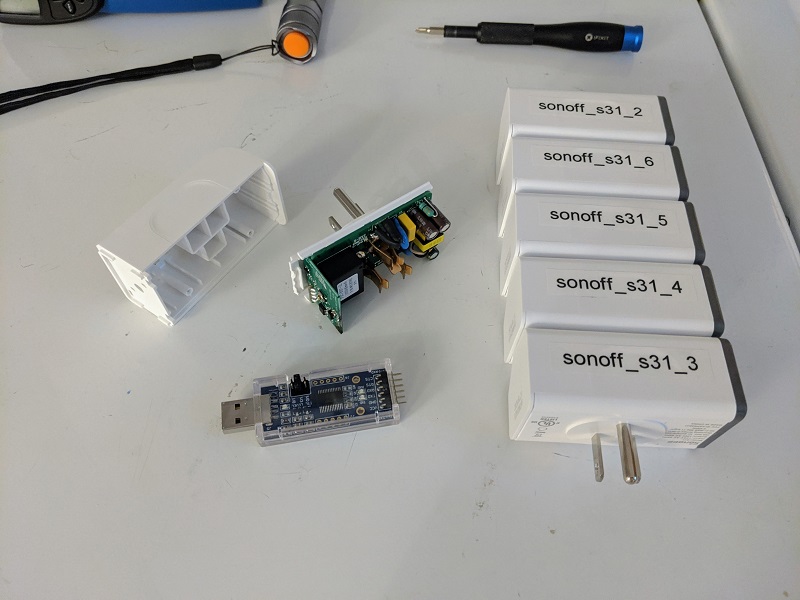
I chose these specific plugs because disassembling/reassembling them is nondestructive. They have plastic edges that slide out to reveal hidden screws. This means I can reassemble them without chipping plastic or gouging edges.
Sonoff S31 plugs disassembled and ready to flash
Preparing
The Sonoff S31 plugs require a USB to serial adapter and a small bit of soldering to flash ESPHome onto. This is usually the part where I would show a picture of my smart plugs with the soldered wires leading off.
Not a chance 👎. The truth is that my soldering job on these plugs was awful. Cold joints and singed pads everywhere. Thankfully after flashing each plug, I was able to remove my terrible solder negating most ill effects.
EDIT (2020-07-23): During my reflection phase I was motivated to upgrade my soldering iron and try again. What a difference that made. I also discovered that my Dupont wires were copper-clad aluminum instead of pure copper. This made soldering to the cheap wires problematic. To make it easier (and less destructive) I attempted the temporary solder joint again with the Dupont connector pins with passable results.
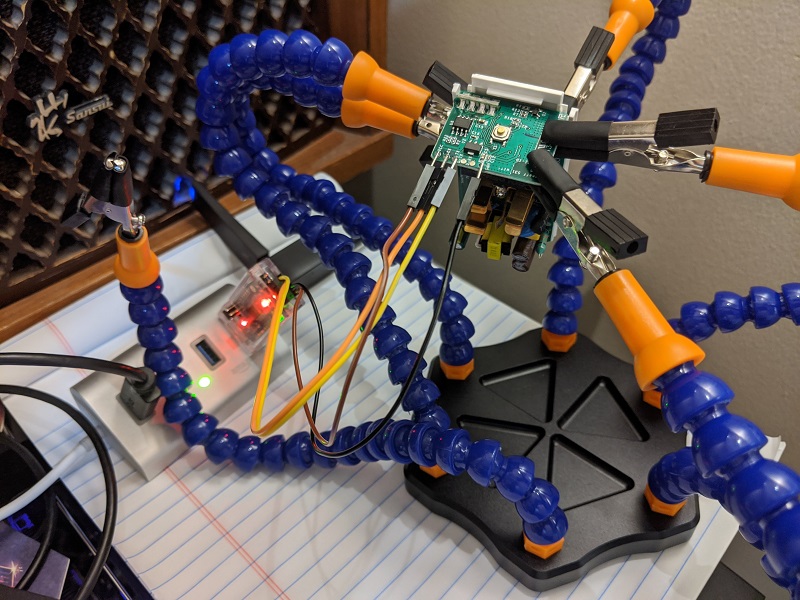 Flashing a Sonoff S31 plug with my ESPHome firmware
In the end I only destroyed 1 of 10 Sonoff S31 plugs I purchased. That is a 90% success rate! 🎉
 Sonoff S31 plugs flashed with ESPHome ready for calibration
Configuring
Here is a sample from my ESPHome configuration for one of my deployed smart plugs.
# Basic Config
# sonoff_s31_1
# Living Room Air Conditioner

substitutions:
  plugtag: sonoff_s31_1
  devicename: Living Room Air Conditioner

wifi:
  ssid: !secret wifi_ssid
  password: !secret wifi_password

  # Enable fallback hotspot (captive portal) in case wifi connection fails
  ap:
    ssid: "${plugtag} Fallback Hotspot"
    password: !secret ap_hotspot_password

# Enable captive portal if wifi ever changes
captive_portal:

# Enable Home Assistant API
api:
  password: !secret api_password

ota:
  password: !secret ota_password

esphome:
  name: ${plugtag}
  comment: ${devicename}
  platform: ESP8266
  board: esp01_1m

# Enable logging
logger:
  baud_rate: 0  # (UART logging interferes with cse7766)

# Device Specific Config
uart:
  rx_pin: RX
  baud_rate: 4800

status_led:
  pin: GPIO13

binary_sensor:
  - platform: gpio
    pin:
      number: GPIO0
      mode: INPUT_PULLUP
      inverted: True
    name: "${devicename} Button"
    on_press:
      - switch.toggle: relay
  - platform: status
    name: "${devicename} Status"

# Enable time component to reset energy at midnight
time:
  - platform: homeassistant
    id: my_time

sensor:
  - platform: wifi_signal
    name: "${devicename} WiFi Signal"
    update_interval: 60s
  - platform: total_daily_energy
    name: "${devicename} Total Daily Energy"
    power_id: power
    accuracy_decimals: 3
    unit_of_measurement: kWh
    filters:
      - multiply: 0.001
  - platform: cse7766
    update_interval: 3s
    current:
      name: "${devicename} Current"
      unit_of_measurement: A
      accuracy_decimals: 3
      filters:
        # Map from sensor -> measured value
        - calibrate_linear:
          - 0 -> 0
          - 3.8 -> 3.957
          - 5.9 -> 6.099
          - 12.7 -> 13.046
        # Make everything below 0.01A appear as just 0A.
        # Furthermore it corrects 0.016A for the power usage of the plug.
        - lambda: if (x < (0.01 - 0.016)) return 0; else return (x - 0.016);
    voltage:
      name: "${devicename} Voltage"
      unit_of_measurement: V
      accuracy_decimals: 1
      filters:
        # Map from sensor -> measured value
        - calibrate_linear:
          - 117.6 -> 118.43
          - 116.8 -> 117.66
          - 116.1 -> 116.87
          - 114.3 -> 115.33
    power:
      name: "${devicename} Power"
      id: power
      unit_of_measurement: W
      accuracy_decimals: 0
      filters:
        # Map from sensor -> measured value
        - calibrate_linear:
          - 0 -> 0
          - 451.5 -> 463.9
          - 687.4 -> 705.53
          - 1446.3 -> 1482.9
        # Make everything below 2W appear as just 0W.
        # Furthermore it corrects 0.91W for the power usage of the plug.
        - lambda: if (x < (2 + 0.91)) return 0; else return (x - 0.91);

switch:
  - platform: gpio
    name: "${devicename}"
    icon: mdi:air-conditioner
    pin: GPIO12
    id: relay
Note that there are custom calibration data points around the electricity monitoring sensors. I wanted extremely accurate power consumption metrics from each plug.
Armed with a hairdryer, Kill A Watt electricity usage monitor, phone camera stream, log viewer, and a tool for capturing screenshots I was able to collect custom data points for electricity usage on each plug. These custom data points allow me to set perfect calibrations for each individual plug rather than assuming identical profiles for each device.
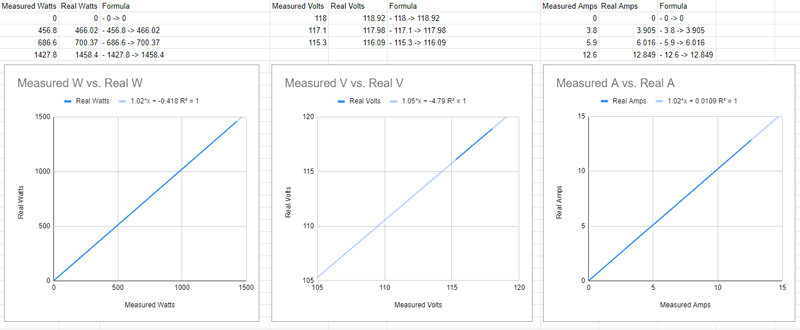 Custom calibration values for one of my ESPHome plugs
Frenck has an excellent blog post that goes over how to calibrate an ESPHome power plug. I would highly recommend giving it a read.
After calibration, everything else was easy. Following the docs, I connected the ESPHome devices up to Home Assistant and placed them on my dashboard.
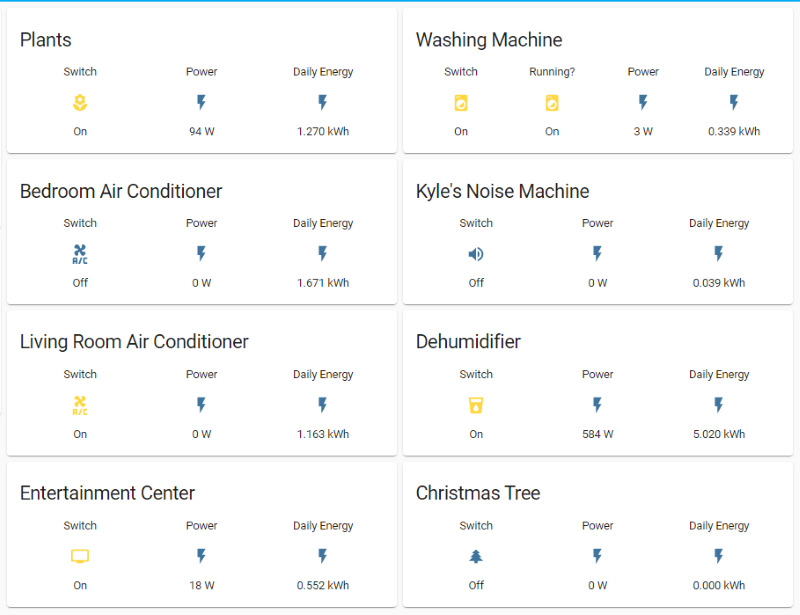 Home Assistant dashboard with ESPHome plugs added
What Will I Do With the Data?
My plan is to use the electricity data to adjust living habits and support new automations.
For example, I want to know how much power (and consequently cost) our dehumidifier is consuming. This allows me to have as a comparison against our comfort level for each humidity setting. The lower we want the humidity, the higher the power consumption/cost. My goal is to approach a happy medium.
I also want to feed my curiosity on how much power devices consume throughout the course of a 24-hour period. But not just the total consumption– I want to see the rate of consumption throughout a given window.
Conclusion
This project to replace my Z-Wave smart plugs came about because I was frustrated with the intricacies of Z-Wave, disappointed in the stability, accustomed to state reporting errors, and had a hard time justifying the expensive hardware cost. The low-power devices are nice, but I do not think they warrant the time spent troubleshooting to keep them working.
After selling 6x Zooz Zen15 plugs, my Z-Wave network has shrunk to a thermostat, 1 button, and an unused wall plug (acting as a repeater because Z-Wave reception is so poor). I think I can envision a future where I have removed the remaining devices.
I was driven by frustration to replace my Z-Wave plugs with something reliable and easy to manage. In the end my solution with ESPHome plugs were cheaper, easier to manage, and more reliable. Now every smart plug on my network can be controlled reliably. The best part is that they actually work. That is all I ever wanted.